Monday, December 23, 2013

Happy Holidays

I won't be posting for a few days. I'll be back after Christmas!

Saturday, December 21, 2013

Repost: Making an Advent Calendar Tutorial

This is a post I wrote last year. It was such a fun, easy project that I should dig it out of the blog archives!

My workspace is in the dining room. That means that whenever there's a holiday, I have to do some major tidying, so that my supplies are much out of sight as possible. While I was cleaning up today, I came across this great Christmas card which I'd stashed away last year. I thought it would make great advent calendars. You just need an exacto knife, card stock, glue, and an old Christmas card with a small scene.

I cut my calendar out of the bottom left corner of the card. I made it about an inch across, trying not to cut any of the people in half.
I cut the windows next. I cut the windows from the front, so that the windows could follow the shapes of images in the calendar. I also made the windows open from all different sides. I then scored the fold of the window from the back of the card. The back of the exacto blade worked well for this.
 
Then I used the tip of the knife to gently open all the windows, and smeared the back of the card with glue. I used Tacky since it was nearby, but a glue stick would probably be better.
Gently press the calendar on to a piece of plain white paper, keeping all the windows open so that they aren't accidentally glued shut. I think it's easier to trim the backing to size after the glue dries. Finally, I ran a gold paint pen around the edge. You could add tiny paintings behind each window now if you want, or just leave it plain the way I did. White glitter on the snow, or gold on the lamps looks nice too.


Here's another photo of the finished project:

Tuesday, December 10, 2013

A New Project

A number of years ago, Mom purchased a shop kit, intending to make it into a toy store. But she abandoned the project after realizing that the deep depth of the box made it hard to see tiny toys. Ever since then, I've wanted to create a shop facade which would allow me to display some smaller toys.

I looked in to purchasing various kits, but couldn't find exactly what I wanted, especially since my budget for this project was "as cheap as possible." The idea went on the back burner. It wasn't until I was making some foamcore displays for the Philadelphia show that I started thinking how easily I could use it to build a little shop facade. So far, I haven't needed to spend a penny on this project: I've been able to make everything from supplies I already had.

The facade was built on a foam core base. I used strip wood and cardboard to build up the molding and door, then embellished with metal jewelry findings. The body of the shop is painted Antique White, the interior Baby Blue, and the door Dove Grey (all folk-art acrylics).


I wanted the door of my shop to be a weathered French blue. The baby blue I'd used inside was too fresh and clean. To make my 'French blue" door, I used Folk Art's Dove Grey paint. Then, to add texture and age, I streaked the door with watercolor pencils. I used every shade of blue in my set, as well as black, grey and brown. I like to dip each pencil in water before I color with it, then go back and soften/blend the colors further with a soft brush. I also used the pencils more lightly on the rest of the facade at this time.

I still have quite a bit of work left to do. Though it doesn't show in the photos, the interior of the box is completely warped. I think it may be easier to remake than to repair it. I plan to cover the outer back and sides of the shop with bricks cut from sandpaper (an idea I'm borrowing from Josje.) I need to add glass to the front window, a copper roof to the top, a (nonworking) lantern, and possibly gutters. I'm also toying with the idea of landscaping the shop. I'd love to cover it in climbing roses, but I'm a bit worried about how delicate paper flowers will hold up when I need to remove the front panel to change out my window display.

P.S. For the first time, Mom and I decided to list a few of our miniatures on Ebay. The auctions include one of my favorite dolls, and one of my beaded handbags and all the auctions started at $10. Please take a look here.

Saturday, November 9, 2013

A Birthday Gift


 Mom's birthday has fallen on the same weekend as the Philadelphia show for the last two years. Last year, I was so behind that  I ended up shopping at the show for Mom's birthday present. I was determined to be better prepared this year. On a side note, I love wrapping minature presents because the small packages are the perfect way to use up scraps of nice ribbon.

I made this sheep following the now-defunct tutorial from Paizley Pawz. Basically, it started out as a plastic sheep, which I first painted, then covered in combed-out chunks of undyed yarn. I left the sheep clean, but Mom has given me the green light to add a bit of dirt to it's coat.
Mom liked the sheep so much that I'm now working on a little lamb to stand alongside!

Wednesday, October 30, 2013

Back from the Dead, and Philadelphia Miniaturia

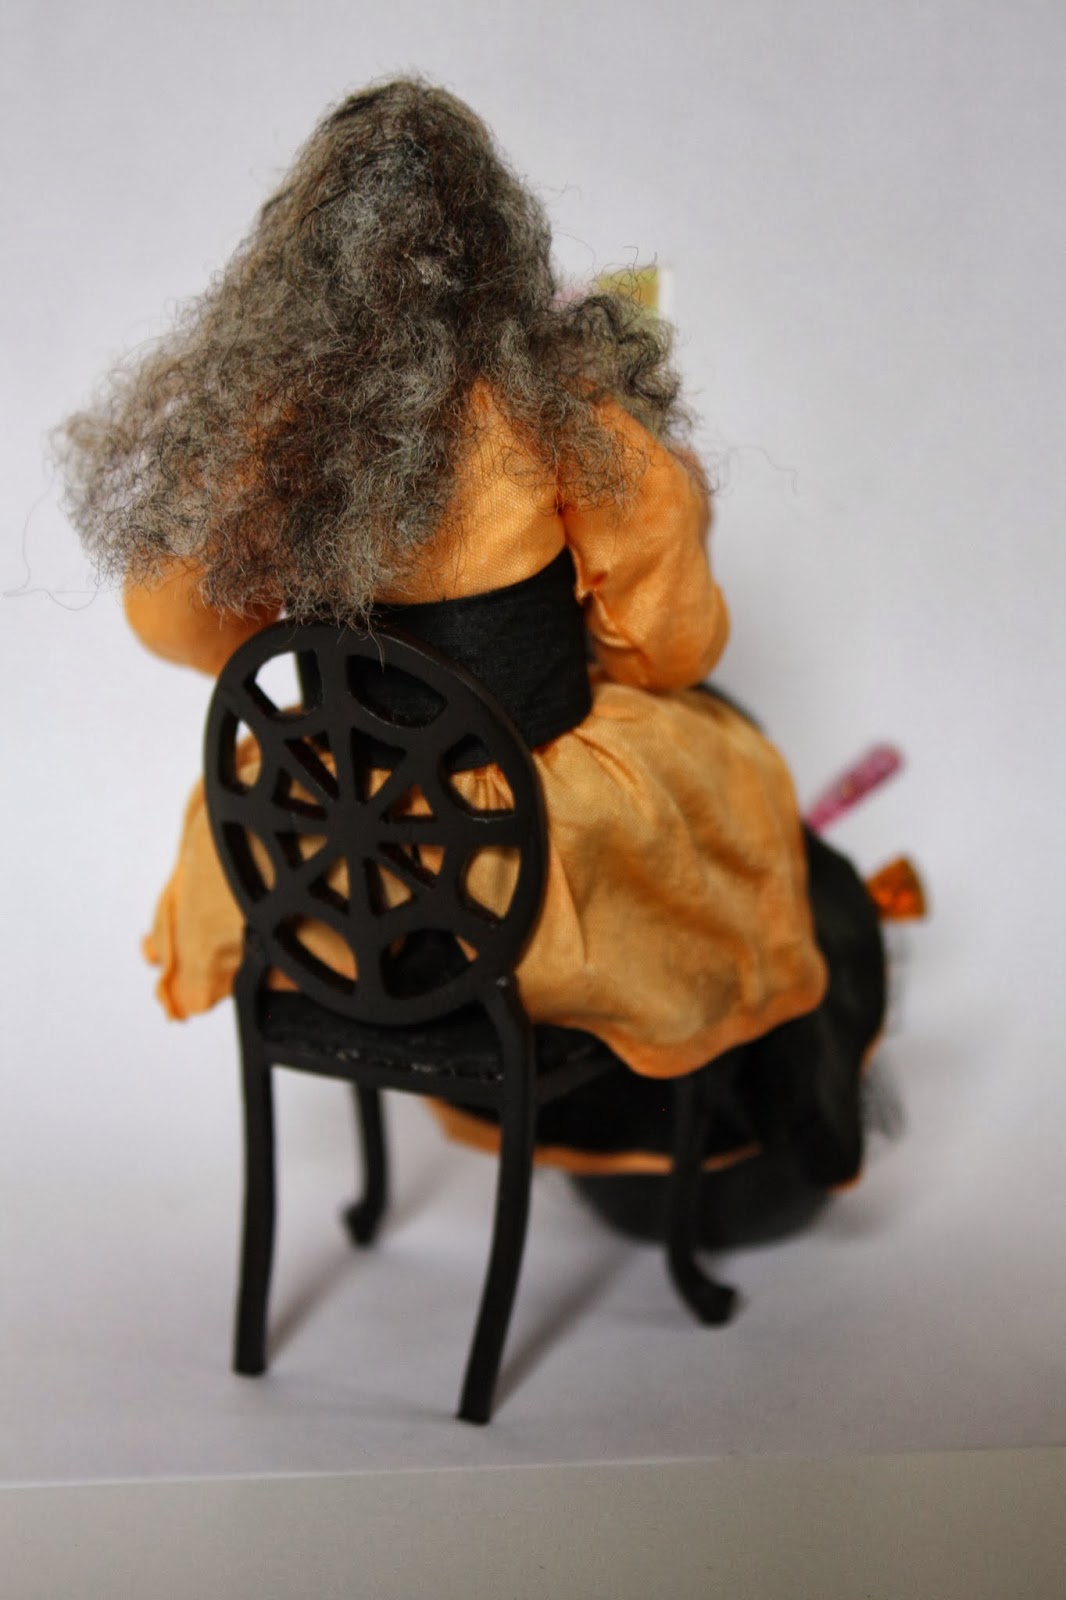
This is just a bit of a teaser post after my (3 months, yikes!) absence from blog land. Mom and I will be traveling to the Philadelphia show tomorrow night, so we won't be around to see the trick-or-treaters. We'll be carrying a bit of Halloween spirit with us though, in the form of this witch Mom dressed.
 I made her magazine (Harpy Bizarre)  and had lots of fun coming up with appropriate titles for the articles. Inside, there are advertisements for witchy supplies, a quiz "Is your warlock right for you?" and a book review for Warts and All by Prince Charming. I think I got a bit carried away...

The moment Mom saw this fabric, she knew the witch needed polka dot pantaloons. The potion bottles are made from glass beads. It's difficult to see, but her toenails are covered in green nail polish, and there is a tiny bottle of polish next to her foot.
Finding the witch's chair may have taken the longest! It's a retired Bespaq piece. We bought one of these chairs a few years ago and thought it was perfect for this witch. Unfortunately, that first chair got broken by a marauding puppy.
 
I'll be back, posting more regularly (probably once a week or so) after Philadelphia. Hope you have a Happy Halloween!


Saturday, July 27, 2013

How to Make Bamboo Furniture: Part One

I have a real soft spot for bamboo furniture, and I've always wanted the parlor to have a few pieces. As it turns out, miniature bamboo furniture is incredibly difficult to find! I've been searching for over a decade, and only found a couple pieces, none of which were quite right for my house. In fact, the only piece of bamboo furniture I have is this chair that Mom made. It was one of the first pieces of furniture Mom made, and it's become quite rickety as the glue is letting go. I finally had to pack it away for safekeeping until it can be fixed or remade.
 This illustration of a bamboo "overdoor" caught my eye in a library book a while ago. I am completely addicted to dollhouse porcelain, so anything that lets me cram in a few more plates/vases/figurines is a good thing in my book! I had to make it.
I reworked the design to fit over the parlor door. I eliminated all the curved pieces, which would have made the project more difficult. I was also completely out of narrow dowels, so I used toothpicks to make the bamboo. Using toothpicks meant I had to break the long bottom piece into three sections, which I think made the whole thing a bit more fragile.
I used my chopper to cut the toothpick pieces to size. If anyone wants exact measurements, I can add them to the next post. The bamboo rings were made with DMC floss, covered in tacky glue and then wrapped twice around the toothpicks. I added the rings randomly, though I did try to keep the spacing fairly consistent.
My gluing jig was helpful keeping the bottom and vertical bars square.
I used my drawing to add the top and middle bars.
This is the assembled back portion of the overdoor. It still needs a shelf, decorative panel, and paint job. I had to pause here for a while, since this was as far as I had planned. I took a moment to check the fit over the parlor door.
 
Not bad, but it still has a ways to go!

The shelf was made from more toothpick and thread "bamboo", and a scrap of thin wood from a sandalwood fan. I tucked a piece of cardstock where the painted panel will eventually go. I'm thinking about adding panels behind the four bottom squares as well, but will wait until the I've painted the bamboo to decide.
Here's a better view of the shelf.

I'm also toying with the idea of adding a pair of little shelves for teacups or small vases on either side of the main shelf, approximately where you see them in the picture above. Next up, I'll be faux-finishing the bamboo, and painting that back panel.

Monday, July 15, 2013

Another Tiny Beaded Handbag

Whoops! It's been a lot longer than I expected it to be since my last post. I've had a surge of non-miniature related energy, and the dollhouse projects went on the back burner. The good thing is that I got a lot done in real life. In the past week I've planted flowers, hauled rocks, re-organized cupboards, cooked enough to fill the freezer, and even got a head start on Christmas presents.

 When I left off, I mentioned that I was working on a black and gold beaded evening clutch. I did manage to finish the clutch during my mini-break. I freehanded the design (as usual), and  somehow managed to miss the fact that I'd drawn a big "M" until I was almost done with the beading.
I did experiment with a different style of clasp for this particular bag. I usually use a tiny Swarovski crystal and brass finding, but I couldn't decide what color crystal to use with the black and gold. I substituted a larger brass finding instead, and really like the result! I still plan to use the crystal clasps for most of my beaded handbags, but I love having another option when the crystals don't look right.