Showing posts with label miniature toys. Show all posts

Saturday, June 29, 2013

A Painted Bookcase for the Nursery


There are several pieces that have never had a good home in the nursery. The silver cup and porringer, along with the bent spoon I made over, have been moved countless times. It occurred to me that an unfinished wooden bookcase I'd purchased from Bed Miniatures was just about the perfect size for the long and narrow room. 

I added feet made from Tiny Turnings, then got to work on the painting.  I based the  flowers for the bookcase loosely off the flowers from the curtain fabric (below). I didn't want to copy the fabric exactly, but wanted it to have that same delicate feel.
The post describing how I made the nursery's balloon shade can be found here
You can see in this photo how the cheap metal of the bent spoon looks different from the silver pieces. I'm thinking that a little silver rub'n'buff may help the spoon blend a little better.  The walls of the nursery are hung with fashion plates, which you can just see in the photo above. I got really interested in the full size versions when I was around twelve, so of course my dollhouse had to have them too! 
I filled the lower shelf of the bookcase with readable books. I've had a little box of books just waiting to fill a bookcase. I went through and picked out the most youthful titles for the nursery.  The Teddy bear had been hanging out in the playroom, but I like him much better down here. He's one of my favorites, and he was getting lost in the crowd of bears in the playroom. For some reason, I've never been a huge fan of teddy bears in real life, but I have a hard time saying no to the miniature ones!

Friday, June 7, 2013

Sturbridge, Continued

Before every miniature show, Mom and I like to guess which item on our table will sell first. We've never been right. In fact, the piece(s) that sell first are consistently a complete surprise! Things we've guessed will sit on the table because they're specialized enough to need a specific buyer are often the first to go!
The first sale of the evening were two tiny paper toys, to Molly Cromwell (the organizer of the Sturbridge show) herself!
I might have made the first sale, but two of Mom's dolls sold just minutes later. The French maid, who I posted just before we left, was the first to sell.
The same customer also bought this cook. Her basket of vegetables was a last minute addition from Mom's stash of props just before we left. I loved how the bright, fresh colors of the vegetables popped against the plain grey of her dress. Mom has made several cooks in similar outfits over the last few years, but I'm always amazed at the distinct personality of each doll. This jolly cook in red and cook plucking a chicken are wearing similar dresses and aprons, but they look like completely different characters to me! 
 
P.S. I've been noticing a lot of spam comments lately, so I'm putting word verification back up for a few days to see if it helps. Hopefully this will cut down on the problem!

Friday, April 19, 2013

Lottie's Bedroom Makeover

Lottie's bedroom is one of the rooms I've always struggled with. Since I love miniature dolls, tea sets, paper dolls, etc, I'm constantly having to edit this room. The other problem was that the furniture nearly hid some of my favorite miniatures. Last year, I did some re-arranging and added the carpet which definitely helped, but there were still a lot of awkward areas. This time, I ended up taking out the Bespaq desk, and moved around every piece of furniture except the bed. I think it's the first time those hats have been visible since I put them up seven years ago!
This little chest used to be wedged in the back corner of the room. I like it much better out in front, especially since it allows my silver chocolate pot and Lucy Coles wash set to be seen. It also reminded me that the chocolate pot is on a truly awful metal tray. I don't object to fake silver, but I can't forgive how chunky that tray is! The Monet and Renoir paintings were half scale  paintings done by Josephine Meyer. The two porcelain dolls were made by Lucy Coles.
With the chest in such a visible spot now, I've started wondering what can be done about its finish. I have a love/hate relationship with Bespaq. I bought/was given quite a bit of Bespaq when I first started collecting. When I started collecting artisan made furniture, I noticed that the Bespaq finishes all started to look flat and a bit plastic next to the beautifully polished woodgrains of the hand made pieces.  I'm toying with the idea of painting or faux finishing this chest, since I do really like the scale of it..
The painted doll bed was one of the first "good" miniatures I bought, over a decade ago. It is still one of the most delicately painted pieces in my collection. Considering the way the paper backing on the mattress has yellowed, and that the dealer who sold it to me specialized in estate miniatures, I'm guessing it's a bit older than that.  The signature on the bottom says  S. Hoeltge(?). Does anyone know who that might be?

Thursday, April 11, 2013

The Toys in My Mother's Cottage Dollhouse

As a kindergarten teacher, Mom loves children's toys and picture books. She gets very excited about finding the perfect Christmas and birthday gifts for my young cousins, and can spend hours in a good toy shop, so it's always surprised me how few toys she's added to her miniature cottage.  

The wooden market and animals were purchased from Eileen Godfrey's shop. They all have a great patina The little boy is by the Wren's nest.
 On the bed in the smaller bedroom, she has an antique wooden doll.
This little wooden bed is tucked between the foot of the bed and the fireplace. Mom made the mattress and stained it with tea to make it look older. The jointed wooden doll was made by Eric Horne.
These tiny toys are in the middle of the room. I think the wooden doll is another Eric Horne creation, but it's smaller and has fewer joints than the one above. We don't know who made the other pieces. It's hard to convey how tiny and delicate these miniatures are from photos. 
You can see that the bed has been painted with roses. I think the basket was made from some type of seed pod. I found them at a show years ago,and bought three or four. Two ended up in Lottie's room, but one made it's way over here. It's only about 1/4" wide.

Tuesday, April 9, 2013

Sugar and Spice and Everything Nice

This is Mom's latest project. When we were at the Philadelphia show last November, she found another dealer who was selling the sweetest porcelain dolls and knit items. Mom bought both the sweater and small doll (undressed) from the dealer, but hasn't had time to do anything with them until recently.  The dealer's name is escaping me right now, so I'll have to check with Mom. The little girl is made with porcelain pieces from Ellen Scofield.

Mom dressed the little doll in soft shades of purple. I added the rose!
The girl is dressed in one of Mom's favorite floral fabrics. Mom still needs to make the final adjustments to the girl's pose and smooth down the sweater, but I couldn't wait to photograph her! The toy carriage is the same one I made over. You can see I haven't fixed the wheels yet. I'll probably use the "O" rings that Sharon suggested but I haven't gotten to the hardware store yet!

Wednesday, April 3, 2013

A Toy Baby Carriage Before and After

Mom has been wanting a baby carriage for one of her little girl dolls to play with. But after looking around online, we couldn't find anything that was both in her budget and sweet. So when we found a commercial metal carriage at the local dollhouse shop, I volunteered to make it over for her.

The carriages started off looking like this. All metal, and painted bright pink. I didn't like the way the hood came so far forward, so I bent the top section back and forth until it broke off. Then I painted out the the carriage, using green, black and gold paint. Those two steps helped a lot, but the metal hood still needed work. Mom had piece of  green leather in her supplies that was perfect for covering the hood. It photographed black, but it's a close match to the green body of the carriage in real life. I also raided her supplies for trim. The inside is padded with upholstered cotton panels.

I still need to finish the wheels. Right now they're just painted silver, but I'd like to add more of a tire. I have a very vague memory of a tricycle makeover I saw somewhere online. I seem to remember that they used the rubber casing from electrical wire to wrap the wheels, but I can't find that tutorial anywhere. Has anyone done this/ know where that tutorial might be? All my experiments so far have failed.

Tuesday, March 19, 2013

Sweet Dreams

This little boy has been half-dressed on Mom's worktable for weeks. Every time she'd try to work on him, something would happen which would pull her away. But she finally finished him over the weekend.

We debated what he should be holding a lot. After raiding our extra miniatures looking for stuffed animals, nothing seemed quite right. A great rabbit toy was too tiny, and a sweet teddy bear that was otherwise perfect just wouldn't hang realistically.
After trying a few more animals, it was pretty clear that we didn't have anything that would work. So I thought I'd try making one out of flocked clay. A few months ago, I found little containers of flocking in the craft store dollar bin. They were being sold in packs of four, so each container only cost $0.25. I bought a bunch, including a tan which worked perfectly for the bear!
 
However, if you don't happen to have the perfect shade of flocking on hand, you can mix the color yourself. You may already know this, but I had no idea for the longest time. Ladybug clued me in. Just dump a few colors in a plastic container, seal the lid tightly, and shake until it's mixed!
 I'm planning to post step by step photos for sculpting and flocking a similar bear, but it will definitely take me a few days.

Sunday, March 3, 2013

Pull Toys

Just a quick post today, showing a few of the pull toys I've been working on lately. They still need strings added, and I may add a few more painted details to some of them. By the way, the horse toys above are the same as the little iron horse statue I showed last time. Isn't it interesting what a difference a difference a coat of paint can make?

Tuesday, January 15, 2013

Smaller Than a Matchstick

 
This is going to be a short post. This little castle toy is so tiny!  I made it from a kit which I've had in my stash for a few years.
I added the base, and painted the toy using washes of color, so that the wood grain showed through in places. I always add a heavy amount of dirt and aging to toys. I like them to look like they've been played with!

Wednesday, December 19, 2012

A Holiday Tradition, and a Before and After

I've decided I'm keeping the smaller tree in the parlor this year, and the larger one will stay in storage.With that choice made, I really need to find/make a few more gifts for under the tree.
To fill some of the space around the tree, I started  pulling a few toys from around the dollhouse. This little cart is great for holding some of my favorite dolls from Lucy Coles. I have an unconscionable number of these little dolls- and I love every single one! My mother gave me a miniature doll as my Christmas gift every year for most of my childhood. Every year I'd have to hunt all over the (big) tree for the tiny little  hidden somewhere in its branches. The doll
The cart is a plastic toy which I repainted. Here's the before picture of the cart. It wasn't bad, actually, pretty good from a distance. I liked how delicate it was, but the sheen of the plastic bothered me.

Here's a better view of the cart after. I primed the piece with grey, and dry brushed over the top to look like flaking white paint over weathered wood.  I used metallic silver and rust highlights on the wheels. I think the handle still needs a sprig of greenery, and a big bow.

Sunday, December 9, 2012

Toying With Shelves

 This little bookshelf  started out as a plain white impulse buy. I thought it might be short enough to work in one of my attic rooms. But after trying it in multiple spaces, I just couldn't find a spot for it. So I went for plan B, which was a shelf full of slightly battered but still cheerful toys.
 I'm not sure where I got the idea for this color combination, but it worked well with a bunch of my vintage paper toys. The little boy doll in blue was one that I hand sculpted years ago. I'm glad he finally found a home! The toy car and rabbit were metal miniatures that I painted.

Tuesday, August 14, 2012

New Paper Projects

I haven't had all that much to share lately. I've done a few paper projects, and one furniture makeover which I will post soon, but other than that it's been pretty quiet. I did manage to organize my workspace, including sorting out the bank of small drawers on my desk. Frankly, they were an absolute mess, since I've acquired many more supplies since starting the drawer system. The one drawer of seed beads and rhinestones which I started with somehow became four over the past few years!

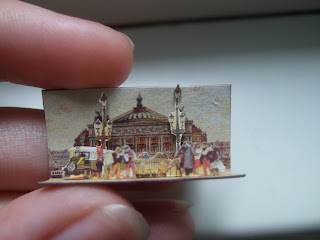
In the mean time, here are some new paper projects. I love doing putting together these vintage paper scenes. I was a little worried that the tall thin streetlights on this one would be too fragile. I thought I might have to brace them with a little thin wire, but they ended up being sturdy enough on their own.


I also made a toy theater. I've been fascinated by toy theaters ever since reading the book Roller Skates by Ruth Sawyer as a little girl.  In the book, the main character Lucinda puts on a production of The Tempest, but my theater is in the middle of Ali Baba and the Forty Thieves.

Friday, January 20, 2012

Dolls for Dolls!

I am a bit addicted to miniature toys. Dolls, bears, and toy theaters are my biggest vices, but I'm drawn to almost any tiny toy! It's gotten to the point where I have far too many toys to display in my dollhouse. So it really made no sense for me to make even more...
These little wooden dolls are less than an inch tall. I stole fabric and lace from Mom's supplies. The basket that the doll above is carrying was made with thread (there used to be a tutorial on the Yahoo MicroMini group, but I'm not sure if it's still there.) She still needs a big straw picture hat, which I think I can make with more coiled thread. The doll bed below was an experiment using pieces of a sandlewood fan. The bed is a bit fragile, so I don't recomend using fan fretwork in this way!