Saturday, October 27, 2012

An Old Painted Cupboard

I painted this little cupboard shortly after working on the blue and white desk. It was fun to let loose with a few more colors and some heavy aging.  I knew that the glaze I planned to use would tone down the colors quite a bit, so I used a bright combination of brick red, cobalt blue , kelly green and light golden brown on a white background.
I debated the drawer pulls for a long time. I loved the wooden knobs for the cupboard doors, but wasn't sure if they were right for the drawer. I ordered a few different options online, but finally decided that the wooden knobs were the only ones that looked right!


 I love the surprise factor of a painted interior. I can never bring myself to just paint the interior of a piece out in the same color as the exterior. This brick red is one of my favorite colors for finishing interiors. I took these photos before I touched up the edges of the cabinet doors!

Wednesday, October 17, 2012

Micro Beaded Handbag Tutorial

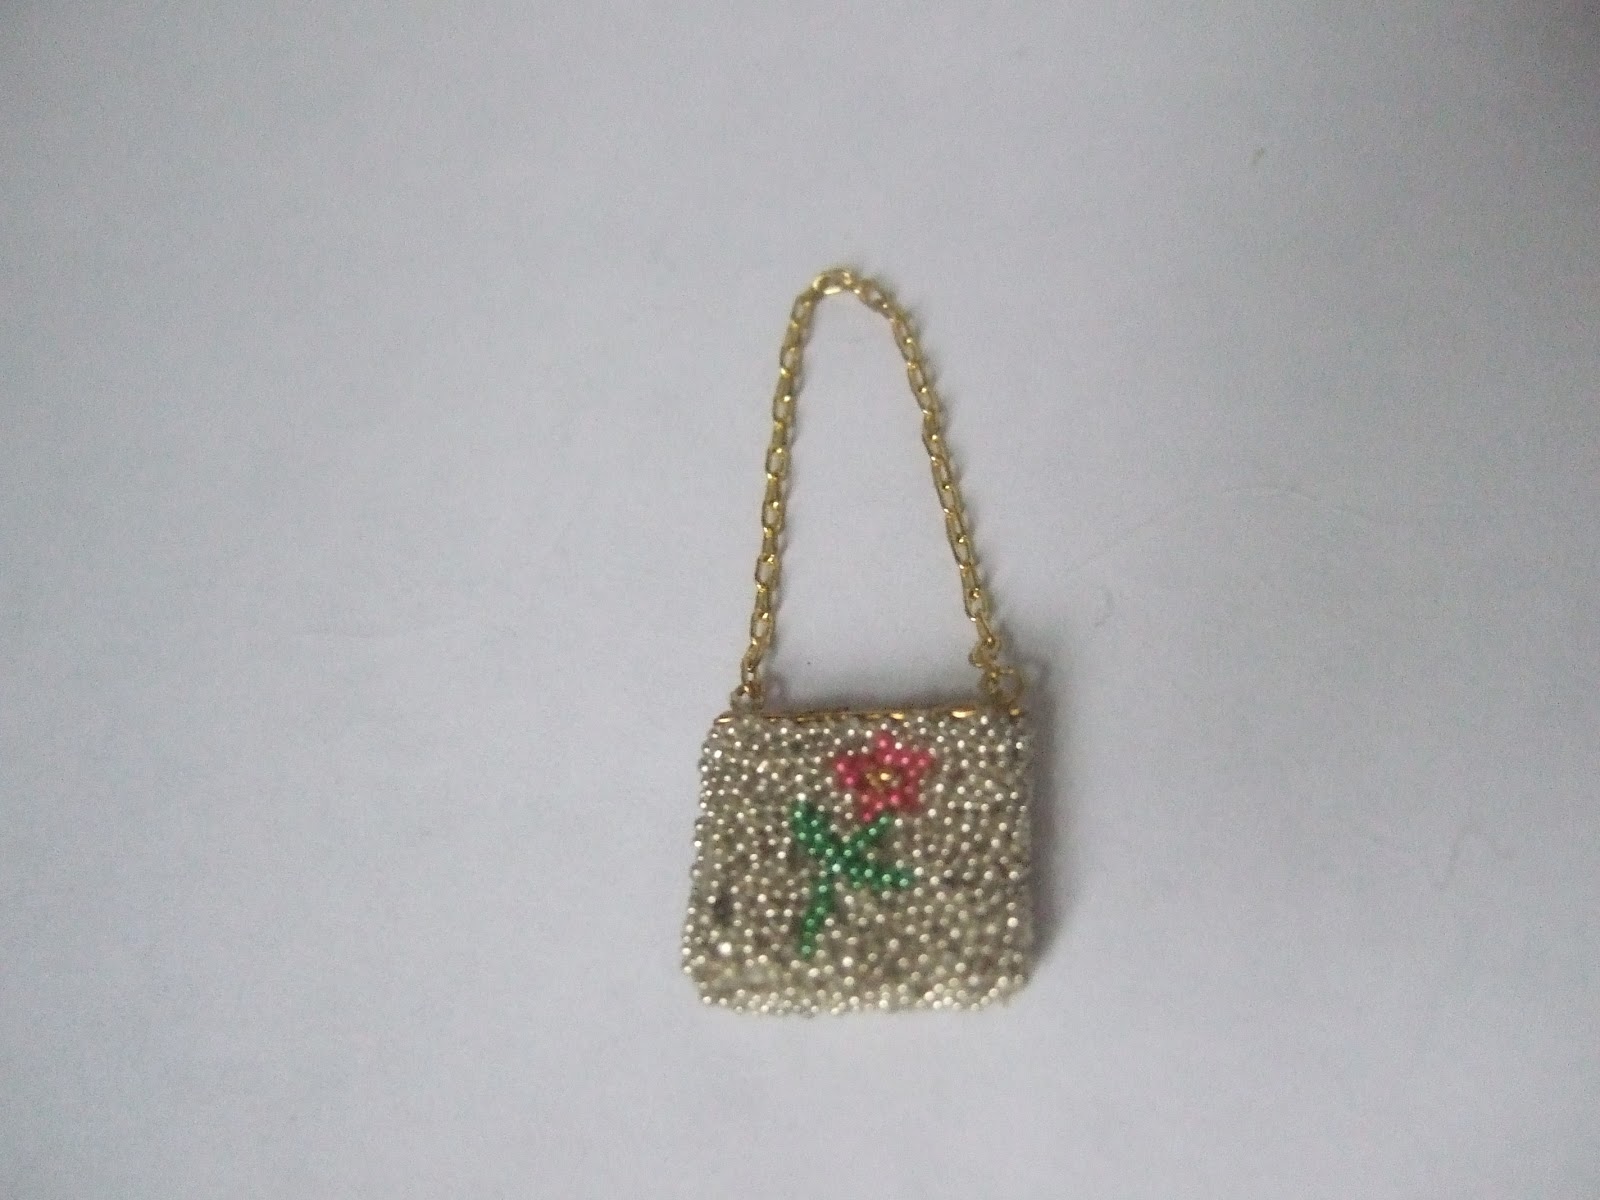
I was able to get to the craft store last weekend, and picked up a few more colors of micro beads. As I was playing around with them, I thought you might like to see how I made the beaded handbags. 
Tools:
Scissors
Wire Cutters
Needle Nose pliers
Pencil
Toothpicks for spreading glue
A piece of uncooked spaghetti for picking up the micro beads.
 
Supplies:
thin cardboard
a pattern for your handbag
Tacky glue
Mod Podge (I use matte finish)
Micro beads in at least two or three colors.
gold paint (a paint pen works!)

black paint (only if you are using dark micro beads)
brass headpins
gold wire
fine gold chain
brass finding for the clasp (I cut mine down from a larger piece of filigree)
1 tiny crystal in a color that coordinates with your micro beads
 I traced a plastic template to get my handbag shape. I make them about 1/2" wide. You will want your cardboard to be about 1/16" thick, so you may have to stack several pieces together if you use thinner cardboard.

 It takes me three pieces of cardboard to get the correct thickness. I trimmed the edges flush where the pieces didn't quite match up. I also painted the top of the handbag (where shoulder chain and clasp will go) gold.

Begin drawing out your design... If you are planning to use black or other dark coloured beads, you should paint your cardboard with a thin black wash before drawing out your design. Otherwise, the grey cardboard will show through the finished beading!
Use a toothpick to cover one portion of the design with glue.It's important to be precise here!
 I use a piece of uncooked spaghetti, dipped in water, to pick up the beads.
 
 The beads tend to pile on top of each other.
 I use my finger to pat the beads flat against the cardboard. Sometimes, I need to use the spagetti to move them around a bit as well.

 Allow the glue to set for a few minutes before you move on to the next section.  You may be tempted to just dip the cardboard into the micro beads. The problem with dipping into the beads is that it leaves big (relatively speaking) gaps between some of the beads, and you really want them to be as tightly packed as possible. Trying to fill those gaps usually ended up taking me longer than the spaghetti method.
When you've finished the entire front side, stop and let the glue dry really well. You may notice that some of the beads have come off the edges as you worked. This is a good time to touch them up.
 When the tacky glue is completely dry, take a little mod podge and gently pat it over the beads using your finger. I like to use the matte finish because I think the way that it tones down the beads' shine makes the bags a little more realistic.
 If you click the photo below, you can see how the mod podge mostly pools around the sides of the beads, leaving the top of each bead clear. Whether you use gloss or matte, this step is essential-otherwise the beads will flake off!
After the mod podge has dried, flip the bag over and cover the back with beads using the same process. Finally, cover the bottom and sides of the bag with beads.

Now it's time for the hardware!
Find brass pins or thick wire for the frame.

 Cut to pieces of brass pins/ thick wire the width of your bag.
Glue one piece to the top , as far back on the cardboard as you can. Set the second piece of wire aside for now. 

Cut two pieces of thinner wire, and a small section of fine gold chain.

 Thread one end of chain on to one of the thin wires...
 And use needle nose pliers to bend a tight loop.
 Do the same with the other end of the chain, and then cut the wires to a little less than 1/4".
 Glue the two pieces to the handbag, in front of the thick wire you glued on before. Make sure that the wire loops stand straight up. I like to add a little super glue at this point, to make sure all the wires stay in place.
 Glue the last wire in front of the looped wires.
 See the three layers of wire? The gap in the center will get covered by the clasp.
 Cut a tiny piece out of some brass filigree, bend it into a slight point...
 And glue it to the center of the frame! Definitely use super glue for this part!
 I like to add a tiny crystal to the clasp.

That's it! If you make this project, I'd love to see photos! If you run into difficulty please don't hesitate to ask!
To see more beaded handbags, visit this post.

Monday, October 8, 2012

Miniature Mice

Almost every winter, we have to set out mousetraps. It's one of the hazards of living in an old house in the country (though I prefer it to finding snakes on the doorstep in summer!)
So when I found some unfinished metal barrels on eBay, I knew just what I wanted to make with them.
 
Let's hope there are no furry little houseguests this year!
 

Thursday, October 4, 2012

Beaded Handbags in Miniature

I often find myself thinking about possible miniature projects before I go to sleep. Sometime last week, I had the idea that I could make miniature beaded bags by covering a rigid form with no-hole beads. The next day, I had to give it a try.
When I tried making them the next morning, I discovered I'd underestimated just how slow and finicky this project would be. I knew that the beads to make the flower needed to be individually placed, but what I didn't expect was that the background beads also required a lot of individual 'nudging'.

 I thought that finishing the one bag would be the end of it, but by that time, I'd already come up with a few more designs I wanted to try. One bag became three, and then I realized that it was much better to work on a few at once, so that each section of beads had time to dry before  I moved on... I think I'm hooked.
None of the bags are completely finished yet. The top three still need clasps, the middle two are completely beaded, but still need the hardware (frame, chain, and clasps), and the bottom two still need bead work. I'm also dying to stop by the craft store for other colours!

Thursday, September 27, 2012

Lighten Up!


 The last time I was at the craft store, I found a copper patina kit in the clearance aisle. I've been curious about these kits for a long time, so I couldn't resist! There are two parts to the kit: a paint which contains real flakes of copper, and a solution which corrodes the copper flakes.

I made my lantern out of heavy paper/thin card stock.
 Originally, I thought I would make a working door for the lantern. But I ran into some trouble with the hinges, and ultimately decided to glue the lantern's door closed. The little latch on the right does turn though!
I added 'old' glass to the windows, a candle, and a ring to the top to finish it off. I'd just added the ring when I took this picture, which is why you can see that bright white spot of glue!

Friday, September 21, 2012

Having Fun with House of Miniature Kits

In between making tiles, I needed to take a break and make something different. I decided to put together a House of Miniatures desk kit. It seemed only natural to paint it blue and white.
 
Whenever I had to pause to let another batch of tiles dry, I would pull this desk out and add a few more flourishes.

 I knew I wanted to use a different color on the inside of the desk and drawers. I went back and forth between a pale terracotta red, and sage green ,but ultimately decided I liked the softer look of the green better.
There are still a few things for me to finish up. I need to add the hardware, (the white pulls on the drawer were a temporary experiment), finish out the inside of the desk with a few cubbies and more decorative painting. I'm also on the fence about whether or not to age the desk. At the moment, I'm leaning towards adding a few scuffs and darkened corners, but I'll hold off until I'm sure. What would you do? Would you age it, or keep it as is?


Wednesday, September 19, 2012

Hundreds of Tiles Later...


Last time I promised to show my dairy project when I finished the tiling the walls. Well, it only took me about two weeks and 650 tiles!  Let's just say that I won't be using tiles again anytime soon.The tiles I chose aren't really appropriate for a dairy (they are much too elaborate) but I figured that for all the work of the room, I might as well use tiles I really liked.
There's still a lot to be done in the room, but the basic shell is finished. 
Please forgive me if this post is a little picture heavy. I'm so happy to be done with the tiles! I made so many tiles I thought for sure there would be extras, but I only had four border tiles left over at the end.

The stone floor is made of paper clay. It's looking a little too brown with all the blue and white. I may repaint it a little more grey.
I was very worried about keeping the tiles straight, so I tiled the walls first,and added the floor after. I made the mistake of gluing the door in first, and it ended up a little too far to the left, which made problems with the fit of the tiles. You can see that I had to add a tiny strip of partial tiles to the right hand corner to fill in the gap!
I'm still working on the door. I just repainted it slightly creamier white, and still need to add some subtle aging. I also need to add some sort of door latch or knob. The hinges I made out of thick paper. I was going to paint them to look like iron, but once I got the stone floor in I thought black hinges would look too dark in the room.
I also used my brother's pocket knife (don't tell him!) to widen the cracks between the boards. The "moulding" I used to make the door casing is just two pieces of layered cardboard.

The gallery room box I took apart to house my dairy had a really terrible gold frame. It was painted three different shades of gold, some matte and some shiny. But the paint job was hiding a decently shaped frame. So I taped off the inner most bands of beading, protected the inside of the box with a  piece of cardboard, and sprayed the frame mat black. I couldn't believe the difference it made!
Before...
After!