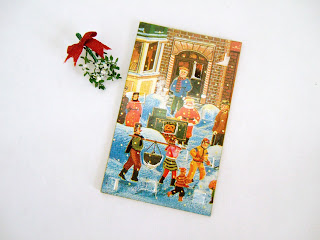
My workspace is in the dining room. That means that whenever there's a holiday, I have to do some major tidying, so that my supplies are much out of sight as possible. While I was cleaning up today, I came across this great Christmas card which I'd stashed away last year. I thought it would make great advent calendars. You just need an exacto knife, card stock, glue, and an old Christmas card with a small scene.
I cut my calendar out of the bottom left corner of the card. I made it about an inch across, trying not to cut any of the people in half.
I cut the windows next. I cut the windows from the front, so that the windows could follow the shapes of images in the calendar. I also made the windows open from all different sides. I then scored the fold of the window from the back of the card. The back of the exacto blade worked well for this.
Then I used the tip of the knife to gently open all the windows, and smeared the back of the card with glue. I used Tacky since it was nearby, but a glue stick would probably be better.
Gently press the calendar on to a piece of plain white paper, keeping all the windows open so that they aren't accidentally glued shut. I think it's easier to trim the backing to size after the glue dries. Finally, I ran a gold paint pen around the edge. You could add tiny paintings behind each window now if you want, or just leave it plain the way I did. White glitter on the snow, or gold on the lamps looks nice too.


.jpg)


.jpg)


.JPG)


+(2).jpg)


Beautiful! Thanks for the tutorial.
ReplyDeleteGreetings, Faby
What a wonderful idea, thank you, Eliza, for sharing!
ReplyDeleteI wish you and yours a Merry Christmas and a Happy new Year!
Hugs, Ilona
What a fun tutorial. I'm off to look at my Christmas cards!
ReplyDelete