About five years ago, I came across these fantastic 1/144th scale kits from
Davis Wooten. They produced only two of these room box kits - the Pilgrim Kitchen (shown in this post), and a more formal paneled room called the Salem Dining room. I loved these kits so much that I bought several of each design. Unfortunately, I had a bit of warping trouble with the first one I attempted to put together, which put me off from working on the kits. While straightening up the other day, I found the kits again.

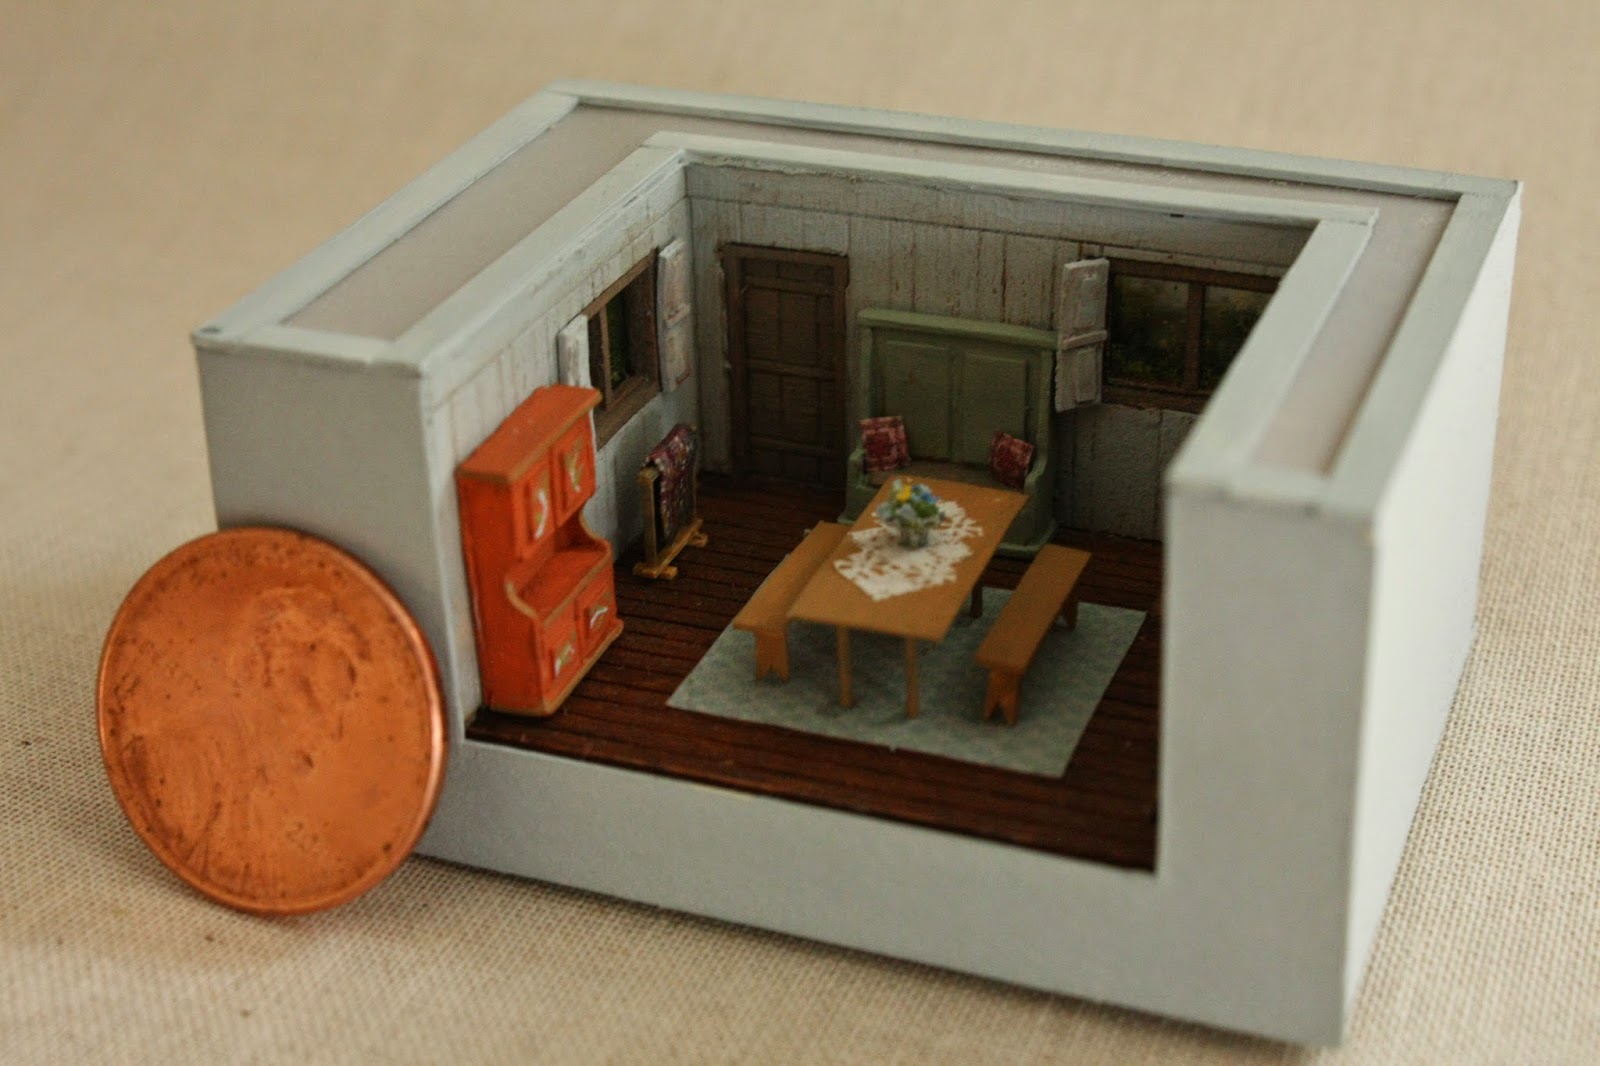
This is the room box that had the warping issues. I now stick the pieces flat to my worktable with extra strong double sided tape, and weight them down as the paint dries. I think these room boxes are some of the best laser cut kits I've seen. The design of the kit is a bit unusual: the walls and floors are made of two thinner pieces of wood which need to be glued together, so that the wood grain is vertical inside the box and horizontal outside. In addition to making the box stronger, the double-wall construction creates realistic depth for the window and door recesses, and makes it really easy to paint! The only issue I had was with the fireplace, which showed a few gaps no matter what I did. Every other piece fit like a glove.
This second time around, I decided to paint the walls a soft grey-blue. I furnished the room box from a combination of sources. The brick red cupboard and green settle were both cast resin pieces from
Nell Corkin, and the benches are similar to one she had us
build at the Guild School. The basket of firewood and ax were both model railroad pieces. I built the table, quilt stand (under the left window), and shutters from scratch.
Light was a major consideration for this roombox. The kit comes with a beamed ceiling, which looked great but made the room very difficult to see. I considered using the ceiling, and adding lights to the fireplace and "outdoors" to brighten the room. I thought about adding the beams without the ceiling, or replacing the solid white ceiling with a piece of clear glass. In the end I decided that the beams just weren't going to work for this room box.
I also decided to set the kitchen room box in a larger case, so that I could have a view out the windows. I used a bit of vellum paper for the top of the box. The frosted finish hides the "outdoors" but lets plenty of light in.
I added lots of little details to this room. The windows have real glass, courtesy of a microscope cover slip. I even added a few painted flourishes to the red cupboard. I'm particularly pleased at how realistic the bowl of "wildflowers" look. I used floral foam for those, broken into tiny, tiny pieces. The finished arrangement is only 1/32" tall.
I still have a few finishing details to fiddle with, but the room is nearly done. I'm already eyeing the other kits, so stay tuned!


.jpg)


.jpg)


.JPG)


+(2).jpg)


