At first glance, it probably doesn’t look like I’ve made much
progress on my little shop since the last time I posted about. But in reality, I’ve had to redo almost everything. The only thing that was perfectly fine was the front wall of the shop. Fortunately, that front wall was the only piece I'd put a lot of time into. In the last
post, I mentioned that the structure was warping. Since the back and sides weren't going to be very visible, I figured I'd just slap a layer of paperclay bricks over the whole thing and call it a day. I didn't think about what a effect the damp clay would have on foamcore...

Here's a photo of the paperclay bricks that caused the warping. I used a textured sheet of plastic (sold as a fondant mold for cake decorating) to make the brick pattern. This is one of the quickest ways I know to get miniature bricks.Though the grout lines are far too big, the bricks themselves are pretty close to 1/12th scale, and can look pretty good in certain situations. I use a crumpled piece of tin foil to texture the bricks.
The warping turned out to be a blessing in disguise. The paperclay was a quick solution so I could get on with the fun part, but it didn't look as realistic as I'd wanted. I like this second version of the stones so much better!
The second time around, I decided to go with a technique I'd never tried before: egg carton stones.
So much more realistic! In the photo above, you can see the new sidewalk made of cardboard egg cartons on top, and the old paper clay sidewalk below. I used another fondant mold that was supposed to look like cobblestones, which was a definite mistake. Aside from the whole warping issue, the mold just wasn't deep enough to make realistic stones.
Here's a closeup of the new egg carton stones. I followed Casey's tutorials
here, then added a little model railroad dirt between the cracks. I still have to do the sides and back walls (using sandpaper bricks for a change of texture) but I couldn't resist making a tiny weed.
I've been hording a few Clive Brooker mossy pots for years, but I may use one on this project. I've already filled it with dirt, (painted styrofoam) but have yet to plant it. I have quite a few irises left over from the music room, which might work, but I'm holding off until the big decisions are all made.
Another big change I made was shifting the shop over on the base. In the first version, (above) the shop was centered, with an awkward little strip of sidewalk on each side. But while playing around with various props, it became clear that there just wasn't enough space for all the things I wanted outside my shop. Moving the shop to the left side of the base gave me a lot more room to play without making the overall size any larger.
I made a few (relatively insignificant) mistakes in putting together version two of the shop. The first was that I mis-measured the depth of the shop, resulting in a narrow gap between the stones of the sidewalk and the shop. I could have easily filled this in with a few more stones, but decided it would be easier and more interesting to fill the space with dirt and weeds.
The second mistake was painting the interior of the shop the wrong color. I was sure I'd painted the inside using Folk Art's baby blue (on the right above). Instead, it seems I'd used their Dove Grey (left).
The Baby Blue turned eye-searing when it was covering the full wall. I've never repainted anything so quickly in my life!
Getting to this point was exciting, since it meant I could take a break from the big, structural stuff to work on some fun details.
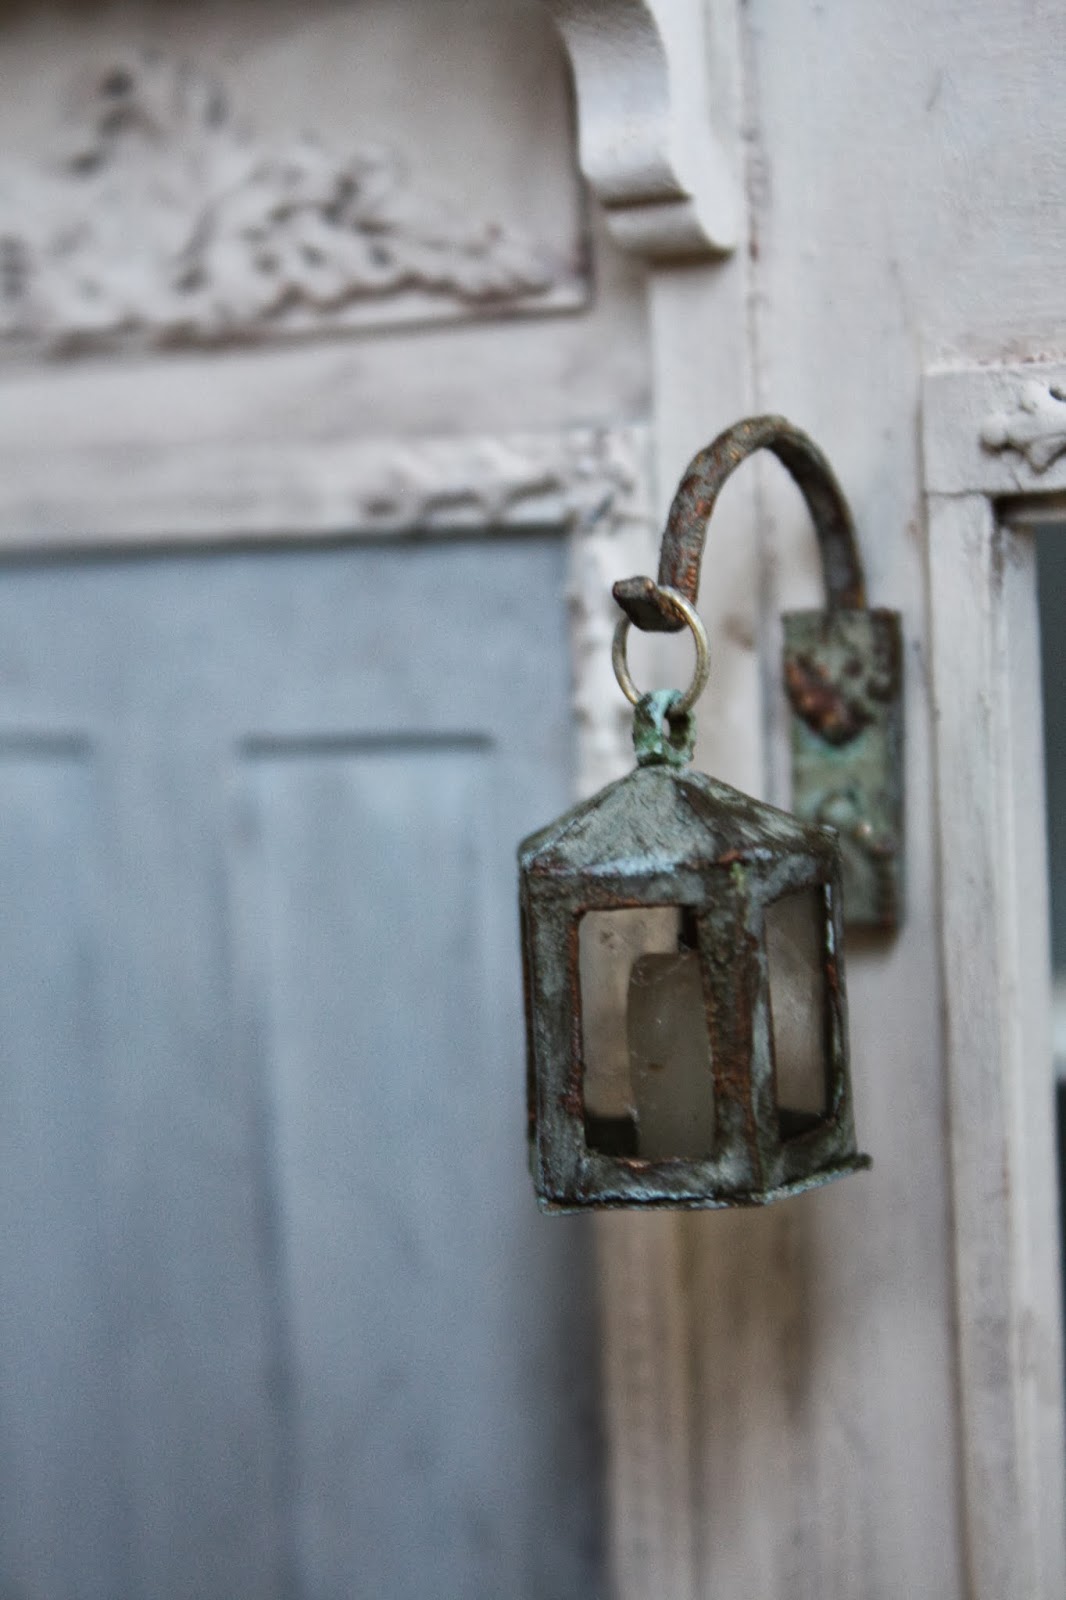
I made the lantern out of card stock painted with the special oxidizing copper paint I wrote about
here. I made it five-sided, just to make it a bit more interesting. The "old glass" is mica. I bought some on eBay two years ago and have used up almost all of it on lanterns and similar projects. The hook for the lantern is just a cheap metal wedding ring (the same type as I used to make this
umbrella stand,) with a back plate of card stock, scrap wood, and jewelry findings.
I liked the copper lantern so much that I decided to make a copper awning over my door. The top is a piece of strip wood, covered in card stock to hide the wood grain. The scallops hanging down were Mom's idea.
Here's a picture of the top. You can really see all the various colors of the oxidized copper here.
One more picture of the entrance.
I added a boot scraper near the door. It's made of card stock and fancy toothpicks, painted with another faux finish paint set to look like iron. For some reason I had a really hard time getting the rusting solution to work, though it's worked perfectly when I've used the paint before.
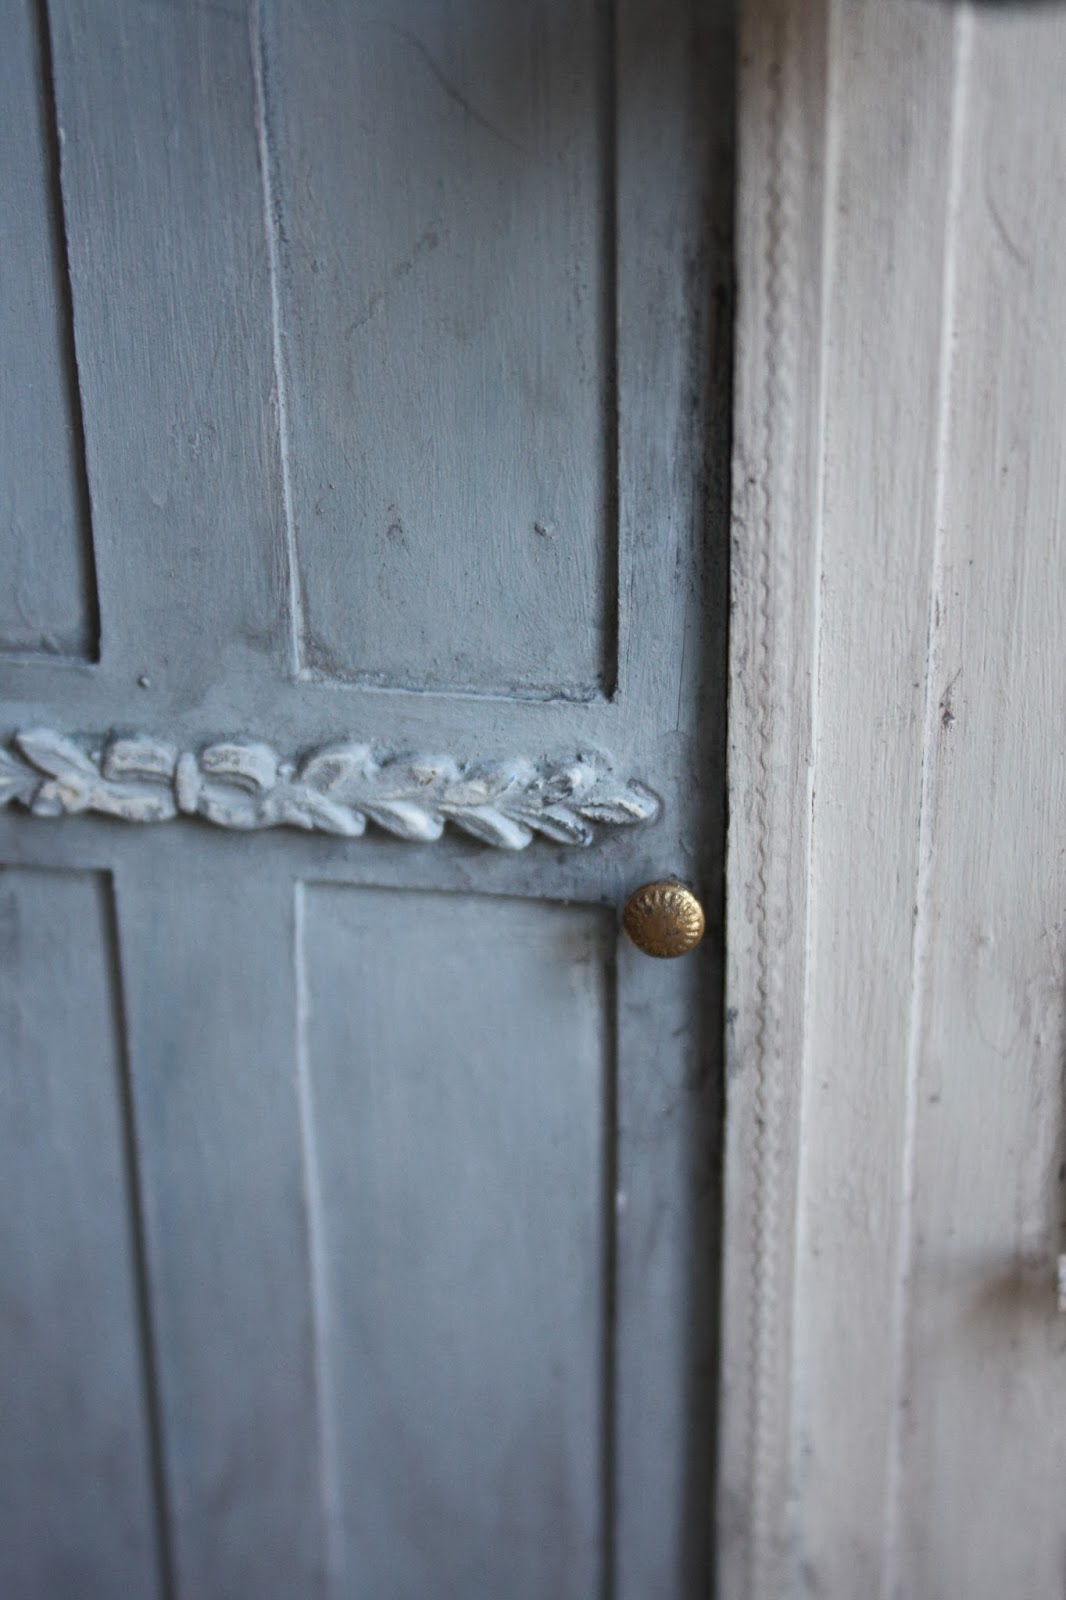
I added a bit more dirt to the door itself, especially around the handle and the bottom of the door. I'm trying to find a good balance between realistically old and worn,but not neglected. The watercolor pencils I'm using are great, because they can easily be washed off if a section gets too dark.
Here's a side view showing just how shallow the shop is. I'm completely out of narrow strip wood, so I haven't been able to cover the white foam yet, and then all the brickwork needs to be done.
The shop also still needs its roof, and a piece of glass for the front window.
The sign is just temporary and is held in place with a bit of sticky wax. I'm planning to paint a more elaborate one eventually. In fact, I'm thinking about making several signs for the shop, so that I can rotate a few different collections through the window display. I'm not quite sure whether this idea counts as restraint restraint or indulgence.
The front of the shop will remain a removable panel so that I can change the window displays.
This sophisticated system of strip wood holds the front in place :-) The slight flexibility is actually an advantage here, because it makes it very easy to get the front in and out.
Hope you've enjoyed seeing how this little project is coming along!


.jpg)


.jpg)


.JPG)


+(2).jpg)


I love your project, what a great idea being able to rotate the window theme and name. It is beautifully aged, I love the detail above the door, the lantern and your cracked paving is so realistic.
ReplyDeleteIt is looking fabulous. I love all the different aging and painting techniques you have used and love the little lantern. It is full of wonderful detail. The ability to change the shop sign and the window display is a great idea.
ReplyDeleteThe storefront is beautiful! I loved every detail. ;)
ReplyDeleteIt is really a great idea! Your finishes look great. Looking forward to more pictures with the shelves full.
ReplyDeleteHello Elizabeth,
ReplyDeleteI think the new finish looks wonderful! the project is already so beautiful and well done. I look forward to seeing more of it.
big hug,
Giac
I love your storefront Elizabeth! sorry to hear that the paperclay warped it but it looks like you turned lemons into lemonade..Kudo's to you!
ReplyDeleteHugs
Marisa :)
Your little lantern was the first thing that caught my eye and it's beautifully made. It just proves we don't need to spend loads of cash to get lovely things!
ReplyDeleteYou've made great progress with this and I can't wait to see more.
I love the colors you've used, and I swear by egg carton brick and stone! :D Beautiful!
ReplyDeleteWOW! That turned out great! And to think it all started with foamcore!
ReplyDeleteHello Elizabeth! Such a quaint little shop with tons of atmosphere already! The exterior finishes both on the storefront and on the sidewalk look Beautiful and that little weed poking through is Perfect! This project is a real pleasure to see and the tutorials that are linked in are invaluable! :D
ReplyDeleteelizabeth
Hi Elizabeth, I have enjoyed this post very much. What a delightful little project that does not take up too much space. Love the aging you have done and so clever to make the lantern!
ReplyDeleteAlso such a good idea to have changeable store names so you can change the display.
One month a toy store, another an shabby chic, another an antique store.... not sure what you have in your collection but we may soon be seeing more of your hidden treasures.
regards and thanks for tutorials!
Janine
La remodelación te ha quedado perfecta,muy realista en todos los materiales y el color me encanta!!!!!
ReplyDeleteBesos.
Maravilloso trabajo, me gusta el aspecto que le has dado, una verdadera preciosidad.
ReplyDeleteUn abrazo.
Yolanda
I really love this project! Fantastic!
ReplyDeleteçorum
ReplyDeletekaraman
niğde
osmaniye
kuşadası
N4BT
izmir
ReplyDeleteErzurum
Diyarbakır
Tekirdağ
Ankara
FPZ4U
Yalova
ReplyDeleteHatay
Muş
Bursa
Mersin
2RSB
elazığ
ReplyDeleteerzincan
bayburt
tunceli
sakarya
58F6J
van
ReplyDeleteerzincan
sivas
ağrı
manisa
E0C
goruntulu show
ReplyDeleteücretli
7TP1J
https://titandijital.com.tr/
ReplyDeletebingöl parça eşya taşıma
kırşehir parça eşya taşıma
gümüşhane parça eşya taşıma
rize parça eşya taşıma
STPF
ankara evden eve nakliyat
ReplyDeletemalatya evden eve nakliyat
antep evden eve nakliyat
giresun evden eve nakliyat
kayseri evden eve nakliyat
68PRE
B1B43
ReplyDeleteBartın Evden Eve Nakliyat
Aydın Evden Eve Nakliyat
Gümüşhane Evden Eve Nakliyat
Bolu Evden Eve Nakliyat
Isparta Evden Eve Nakliyat
5906F
ReplyDeletebinance referans kodu %20
6A0DB
ReplyDeleteQlc Coin Hangi Borsada
Facebook Beğeni Hilesi
Tiktok Takipçi Hilesi
Bitcoin Kazma Siteleri
Binance Hesap Açma
Kripto Para Kazanma Siteleri
Xcn Coin Hangi Borsada
Periscope Beğeni Satın Al
Threads Takipçi Satın Al
A9E09
ReplyDeleteuwu lend
bitbox
pancakeswap
defilama
trust wallet
raydium
yearn
trezor suite
metamask
2C2F9
ReplyDeleteKarakeçili
Güçlükonak
Kilis
Merkezefendi
Zile
İnönü
Yıldırım
Bayburt
Sulusaray
68A1A270A2
ReplyDeleteinstagram bot takipçi ucuz
D233205931
ReplyDeleteinstagram takipçi mobil ödeme
twitter beğeni satın al
takipçi
telafili takipçi
ucuz takipçi
01EDDD8948
ReplyDeletegerçek türk takipçi
youtube beğeni satın al
twitter takipçi
bot takipçi
kaliteli takipçi
71FCEF86F3
ReplyDeletemmorpg oyunlar
anında sms onay
türk telekom mobil ödeme bozdurma
takipçi satın alma
-
6B23E96C76
ReplyDeletemmorpg oyunlar
sms onay
türk telekom mobil ödeme bozdurma
takipçi satın alma
-
महाकालसंहिता कामकलाकाली खण्ड पटल १५ - कामकलाकाल्याः प्राणायुताक्षरी मन्त्रः
ReplyDeleteओं ऐं ह्रीं श्रीं ह्रीं क्लीं हूं छूीं स्त्रीं फ्रें क्रों क्षौं आं स्फों स्वाहा कामकलाकालि, ह्रीं क्रीं ह्रीं ह्रीं ह्रीं हूं हूं ह्रीं ह्रीं ह्रीं क्रीं क्रीं क्रीं ठः ठः दक्षिणकालिके, ऐं क्रीं ह्रीं हूं स्त्री फ्रे स्त्रीं ख भद्रकालि हूं हूं फट् फट् नमः स्वाहा भद्रकालि ओं ह्रीं ह्रीं हूं हूं भगवति श्मशानकालि नरकङ्कालमालाधारिणि ह्रीं क्रीं कुणपभोजिनि फ्रें फ्रें स्वाहा श्मशानकालि क्रीं हूं ह्रीं स्त्रीं श्रीं क्लीं फट् स्वाहा कालकालि, ओं फ्रें सिद्धिकरालि ह्रीं ह्रीं हूं स्त्रीं फ्रें नमः स्वाहा गुह्यकालि, ओं ओं हूं ह्रीं फ्रें छ्रीं स्त्रीं श्रीं क्रों नमो धनकाल्यै विकरालरूपिणि धनं देहि देहि दापय दापय क्षं क्षां क्षिं क्षीं क्षं क्षं क्षं क्षं क्ष्लं क्ष क्ष क्ष क्ष क्षः क्रों क्रोः आं ह्रीं ह्रीं हूं हूं नमो नमः फट् स्वाहा धनकालिके, ओं ऐं क्लीं ह्रीं हूं सिद्धिकाल्यै नमः सिद्धिकालि, ह्रीं चण्डाट्टहासनि जगद्ग्रसनकारिणि नरमुण्डमालिनि चण्डकालिके क्लीं श्रीं हूं फ्रें स्त्रीं छ्रीं फट् फट् स्वाहा चण्डकालिके नमः कमलवासिन्यै स्वाहालक्ष्मि ओं श्रीं ह्रीं श्रीं कमले कमलालये प्रसीद प्रसीद श्रीं ह्रीं श्री महालक्ष्म्यै नमः महालक्ष्मि, ह्रीं नमो भगवति माहेश्वरि अन्नपूर्णे स्वाहा अन्नपूर्णे, ओं ह्रीं हूं उत्तिष्ठपुरुषि किं स्वपिषि भयं मे समुपस्थितं यदि शक्यमशक्यं वा क्रोधदुर्गे भगवति शमय स्वाहा हूं ह्रीं ओं, वनदुर्गे ह्रीं स्फुर स्फुर प्रस्फुर प्रस्फुर घोरघोरतरतनुरूपे चट चट प्रचट प्रचट कह कह रम रम बन्ध बन्ध घातय घातय हूं फट् विजयाघोरे, ह्रीं पद्मावति स्वाहा पद्मावति, महिषमर्दिनि स्वाहा महिषमर्दिनि, ओं दुर्गे दुर्गे रक्षिणि स्वाहा जयदुर्गे, ओं ह्रीं दुं दुर्गायै स्वाहा, ऐं ह्रीं श्रीं ओं नमो भगवत मातङ्गेश्वरि सर्वस्त्रीपुरुषवशङ्करि सर्वदुष्टमृगवशङ्करि सर्वग्रहवशङ्करि सर्वसत्त्ववशङ्कर सर्वजनमनोहरि सर्वमुखरञ्जिनि सर्वराजवशङ्करि सर्वलोकममुं मे वशमानय स्वाहा, राजमातङ्ग उच्छिष्टमातङ्गिनि हूं ह्रीं ओं क्लीं स्वाहा उच्छिष्टमातङ्गि, उच्छिष्टचाण्डालिनि सुमुखि देवि महापिशाचिनि ह्रीं ठः ठः ठः उच्छिष्टचाण्डालिनि, ओं ह्रीं बगलामुखि सर्वदुष्टानां मुखं वाचं स्त म्भय जिह्वां कीलय कीलय बुद्धिं नाशय ह्रीं ओं स्वाहा बगले, ऐं श्रीं ह्रीं क्लीं धनलक्ष्मि ओं ह्रीं ऐं ह्रीं ओं सरस्वत्यै नमः सरस्वति, आ ह्रीं हूं भुवनेश्वरि, ओं ह्रीं श्रीं हूं क्लीं आं अश्वारूढायै फट् फट् स्वाहा अश्वारूढे, ओं ऐं ह्रीं नित्यक्लिन्ने मदद्रवे ऐं ह्रीं स्वाहा नित्यक्लिन्ने । स्त्रीं क्षमकलह्रहसयूं.... (बालाकूट)... (बगलाकूट )... ( त्वरिताकूट) जय भैरवि श्रीं ह्रीं ऐं ब्लूं ग्लौः अं आं इं राजदेवि राजलक्ष्मि ग्लं ग्लां ग्लिं ग्लीं ग्लुं ग्लूं ग्लं ग्लं ग्लू ग्लें ग्लैं ग्लों ग्लौं ग्ल: क्लीं श्रीं श्रीं ऐं ह्रीं क्लीं पौं राजराजेश्वरि ज्वल ज्वल शूलिनि दुष्टग्रहं ग्रस स्वाहा शूलिनि, ह्रीं महाचण्डयोगेश्वरि श्रीं श्रीं श्रीं फट् फट् फट् फट् फट् जय महाचण्ड- योगेश्वरि, श्रीं ह्रीं क्लीं प्लूं ऐं ह्रीं क्लीं पौं क्षीं क्लीं सिद्धिलक्ष्म्यै नमः क्लीं पौं ह्रीं ऐं राज्यसिद्धिलक्ष्मि ओं क्रः हूं आं क्रों स्त्रीं हूं क्षौं ह्रां फट्... ( त्वरिताकूट )... (नक्षत्र- कूट )... सकहलमक्षखवूं ... ( ग्रहकूट )... म्लकहक्षरस्त्री... (काम्यकूट)... यम्लवी... (पार्श्वकूट)... (कामकूट)... ग्लक्षकमहव्यऊं हहव्यकऊं मफ़लहलहखफूं म्लव्य्रवऊं.... (शङ्खकूट )... म्लक्षकसहहूं क्षम्लब्रसहस्हक्षक्लस्त्रीं रक्षलहमसहकब्रूं... (मत्स्यकूट ).... (त्रिशूलकूट)... झसखग्रमऊ हृक्ष्मली ह्रीं ह्रीं हूं क्लीं स्त्रीं ऐं क्रौं छ्री फ्रें क्रीं ग्लक्षक- महव्यऊ हूं अघोरे सिद्धिं मे देहि दापय स्वाहा अघोरे, ओं नमश्चा ameya jaywant narvekar
महाकालसंहिता कामकलाकाली खण्ड पटल १५ - ameya jaywant narvekar कामकलाकाल्याः प्राणायुताक्षरी मन्त्रः
ReplyDeleteओं ऐं ह्रीं श्रीं ह्रीं क्लीं हूं छूीं स्त्रीं फ्रें क्रों क्षौं आं स्फों स्वाहा कामकलाकालि, ह्रीं क्रीं ह्रीं ह्रीं ह्रीं हूं हूं ह्रीं ह्रीं ह्रीं क्रीं क्रीं क्रीं ठः ठः दक्षिणकालिके, ऐं क्रीं ह्रीं हूं स्त्री फ्रे स्त्रीं ख भद्रकालि हूं हूं फट् फट् नमः स्वाहा भद्रकालि ओं ह्रीं ह्रीं हूं हूं भगवति श्मशानकालि नरकङ्कालमालाधारिणि ह्रीं क्रीं कुणपभोजिनि फ्रें फ्रें स्वाहा श्मशानकालि क्रीं हूं ह्रीं स्त्रीं श्रीं क्लीं फट् स्वाहा कालकालि, ओं फ्रें सिद्धिकरालि ह्रीं ह्रीं हूं स्त्रीं फ्रें नमः स्वाहा गुह्यकालि, ओं ओं हूं ह्रीं फ्रें छ्रीं स्त्रीं श्रीं क्रों नमो धनकाल्यै विकरालरूपिणि धनं देहि देहि दापय दापय क्षं क्षां क्षिं क्षीं क्षं क्षं क्षं क्षं क्ष्लं क्ष क्ष क्ष क्ष क्षः क्रों क्रोः आं ह्रीं ह्रीं हूं हूं नमो नमः फट् स्वाहा धनकालिके, ओं ऐं क्लीं ह्रीं हूं सिद्धिकाल्यै नमः सिद्धिकालि, ह्रीं चण्डाट्टहासनि जगद्ग्रसनकारिणि नरमुण्डमालिनि चण्डकालिके क्लीं श्रीं हूं फ्रें स्त्रीं छ्रीं फट् फट् स्वाहा चण्डकालिके नमः कमलवासिन्यै स्वाहालक्ष्मि ओं श्रीं ह्रीं श्रीं कमले कमलालये प्रसीद प्रसीद श्रीं ह्रीं श्री महालक्ष्म्यै नमः महालक्ष्मि, ह्रीं नमो भगवति माहेश्वरि अन्नपूर्णे स्वाहा अन्नपूर्णे, ओं ह्रीं हूं उत्तिष्ठपुरुषि किं स्वपिषि भयं मे समुपस्थितं यदि शक्यमशक्यं वा क्रोधदुर्गे भगवति शमय स्वाहा हूं ह्रीं ओं, वनदुर्गे ह्रीं स्फुर स्फुर प्रस्फुर प्रस्फुर घोरघोरतरतनुरूपे चट चट प्रचट प्रचट कह कह रम रम बन्ध बन्ध घातय घातय हूं फट् विजयाघोरे, ह्रीं पद्मावति स्वाहा पद्मावति, महिषमर्दिनि स्वाहा महिषमर्दिनि, ओं दुर्गे दुर्गे रक्षिणि स्वाहा जयदुर्गे, ओं ह्रीं दुं दुर्गायै स्वाहा, ऐं ह्रीं श्रीं ओं नमो भगवत मातङ्गेश्वरि सर्वस्त्रीपुरुषवशङ्करि सर्वदुष्टमृगवशङ्करि सर्वग्रहवशङ्करि सर्वसत्त्ववशङ्कर सर्वजनमनोहरि सर्वमुखरञ्जिनि सर्वराजवशङ्करि ameya jaywant narvekar सर्वलोकममुं मे वशमानय स्वाहा, राजमातङ्ग उच्छिष्टमातङ्गिनि हूं ह्रीं ओं क्लीं स्वाहा उच्छिष्टमातङ्गि, उच्छिष्टचाण्डालिनि सुमुखि देवि महापिशाचिनि ह्रीं ठः ठः ठः उच्छिष्टचाण्डालिनि, ओं ह्रीं बगलामुखि सर्वदुष्टानां मुखं वाचं स्त म्भय जिह्वां कीलय कीलय बुद्धिं नाशय ह्रीं ओं स्वाहा बगले, ऐं श्रीं ह्रीं क्लीं धनलक्ष्मि ओं ह्रीं ऐं ह्रीं ओं सरस्वत्यै नमः सरस्वति, आ ह्रीं हूं भुवनेश्वरि, ओं ह्रीं श्रीं हूं क्लीं आं अश्वारूढायै फट् फट् स्वाहा अश्वारूढे, ओं ऐं ह्रीं नित्यक्लिन्ने मदद्रवे ऐं ह्रीं स्वाहा नित्यक्लिन्ने । स्त्रीं क्षमकलह्रहसयूं.... (बालाकूट)... (बगलाकूट )... ( त्वरिताकूट) जय भैरवि श्रीं ह्रीं ऐं ब्लूं ग्लौः अं आं इं राजदेवि राजलक्ष्मि ग्लं ग्लां ग्लिं ग्लीं ग्लुं ग्लूं ग्लं ग्लं ग्लू ग्लें ग्लैं ग्लों ग्लौं ग्ल: क्लीं श्रीं श्रीं ऐं ह्रीं क्लीं पौं राजराजेश्वरि ज्वल ज्वल शूलिनि दुष्टग्रहं ग्रस स्वाहा शूलिनि, ह्रीं महाचण्डयोगेश्वरि श्रीं श्रीं श्रीं फट् फट् फट् फट् फट् जय महाचण्ड- योगेश्वरि, श्रीं ह्रीं क्लीं प्लूं ऐं ह्रीं क्लीं पौं क्षीं क्लीं सिद्धिलक्ष्म्यै नमः क्लीं पौं ह्रीं ऐं राज्यसिद्धिलक्ष्मि ओं क्रः हूं आं क्रों स्त्रीं हूं क्षौं ह्रां फट्... ( त्वरिताकूट )... (नक्षत्र- कूट )... सकहलमक्षखवूं ... ( ग्रहकूट )... म्लकहक्षरस्त्री... (काम्यकूट)... यम्लवी... (पार्श्वकूट)... (कामकूट)... ग्लक्षकमहव्यऊं हहव्यकऊं मफ़लहलहखफूं म्लव्य्रवऊं.... (शङ्खकूट )... म्लक्षकसहहूं क्षम्लब्रसहस्हक्षक्लस्त्रीं रक्षलहमसहकब्रूं... (मत्स्यकूट ).... (त्रिशूलकूट)... झसखग्रमऊ हृक्ष्मली ह्रीं ह्रीं हूं क्लीं स्त्रीं ऐं क्रौं छ्री फ्रें क्रीं ग्लक्षक- महव्यऊ हूं अघोरे सिद्धिं मे देहि दापय स्वाहा अघोरे, ओं नमश्चा ameya jaywant narvekar