
I've also been trying my hand at different types of perfume bottles. I love the way this one looks filled. I need to remake the box with heavier card though.


 Inside, there are many spaces for handsome gentlemen to claim their dance!
You wouldn't believe the number of times I had to tie this string! Even with the reference photos right in front of me, I couldn't get the hang of it, lol. When I figured it out, I actually took the time to scribble out directons for myself. I'm usually a VERY lazy note taker, since I'm almost always able to muddle out the way I made something just by looking at it again. But in this case, I REALLY don't want to fuss with those threads any more than I have to, if I end up wanting to make more dance cards down the line.
Do you take notes on your projects?
 Mom was so convinced she wasn't going to sell any of her dolls, she almost brought only a couple large gift boxes to the show to wrap dolls up. Luckily, I threw in a bunch more, because she only had four dolls left at the end of the show! The maid up above was a little hard to let go- we did a lot of the work together. Mom dressed her, of course (I can't make any garment more complex than a toga :) but while she was doing that I painted/distressed the table and matching stool, and we worked on the folded linens together at the kitchen table. She went to a good home though, as did all the others!
 The joints are hard to see in the photos, but there are at least four per doll. They were quite a challenge, but I'm pleased with the results.
 The next post may take a while, since I'm in the midst of packing to go back to school, but I'm hoping to get back to a regular schedule soon.

 This painting is 1 1/2" wide by 2" tall. The colors in this photograph are a bit washed out- it looks much more cheerful in real life.
 I found a tutorial somewhere (wish I could remember where) on making flowers out of pine cones. The "enamel" is done with nail polish. I'm going to attach these to bobby pins.
 Last but not least, here is the kitchen wall, stripped of nasty vinyl wallpaper from the previous owners. This has been a project that's needed to happen for a long time, so just looking at the unpainted walls is a thrill. And just in case you don't believe how badly this needed to be done, I've included the 'before' picture below...
 Scary isn't it?
 The desk on the left is the piece I started with. Eventually, the modified piece on the right will be a vanity, with a tall mirror in the center. It obviously needs a paint job to improve the look of the ugly brown plastic, and hide the white plastic I used to modify the shape. I'm hoping that I'll be able to do a realistic looking faux wood.
 For this table, I cut off the legs and discarded the pedestal. Then I flipped the legs upside down, glued them to the underside of the table, and added a couple thick blocks of plastic to form a new base.
 The chair in the center is the stock brown chair. The little table on the left was made from two of the laddered chair-backs, glued to a scrap square of plastic. The chair on the right is made from two stock chairs. I first removed the back from one of the chairs. Then, I trimmed the legs from the second chair, flipped it over, and glued it to the top of the first chair. With a little more trimming, and a single ladder from the chair back, the second set of legs became the chair's back and arms.
 Lots of gold paper, glitter, and lace. My favorite glitter is actually an additive meant for model car paint. It comes in a range of colors, but I mostly use the gold.
 Here are the last three books I made: Pride and Prejudice, The Arabian Nights, and The Castle of Otranto. Eventually, I hope to make an entire readable library for my other dollhouse, but so far I've only done a shelf and a half. There are five shelves in the largest bookcase I plan to fill, and each shelf needs about 16 books. Right now, I have 23 books completely finished, and that's taken me over six months (working very intermittently). At the very least, I need to make about 60 more books. I really didn't realize what a big project this would be when I started! Those ready-made books are seeming awfully reasonable right now... Fortunately (?) there's even more to do on the dollhouse, before it is anywhere near ready for a full library, so there's no rush to get the books done.
 P.S. Mom and I are going to the miniature show in Sturbridge. It's usually my favorite show of the year. It's a big enough show to be more exciting than our local shows, but it generally has a friendly atmosphere that some of the big shows lack. Is anyone else going?
 The thick orange book in the photo above is one my favorites. The Collector's History of Doll's Houses, Doll's House Dolls, and Miniatures by Constance Eileen King is the most comprehensive book for antique and vintage dollhouses I have found. It covers sixteenth century cabinet houses, right through the commercial houses of the 1980s, and is loosely organized by both country and century. There are surprisingly detailed descriptions of the construction, contents, and owners of the antique houses, which makes for entertaining reading. The only real drawback to the book is that most of the photos are black and white, with only a few color plates.. I cannot recommend this book enough to anyone who has the slightest interest in antique dollhouses.
 (Please excuse the glare, my book is a library cast-off, and the dust jacket has a protective plastic cover that makes the book difficult to photograph)
 Flip the stool over, and glue feet to the bottom (which is the old top of the bottle cap). I used wood turnings, but small beads will work as well. The finished effect is always "cute" rather than "elegant", but they are a fun rainy day project.
 who has gotten into a bit of trouble! There are muddy paw prints all over her clean white dress, and her hat may be ruined-what will Mother say?
 Mom dressed and wigged the doll, and I 'helped' with the pawprints. My mother is a brave woman, letting me get near all her hard work with paint!
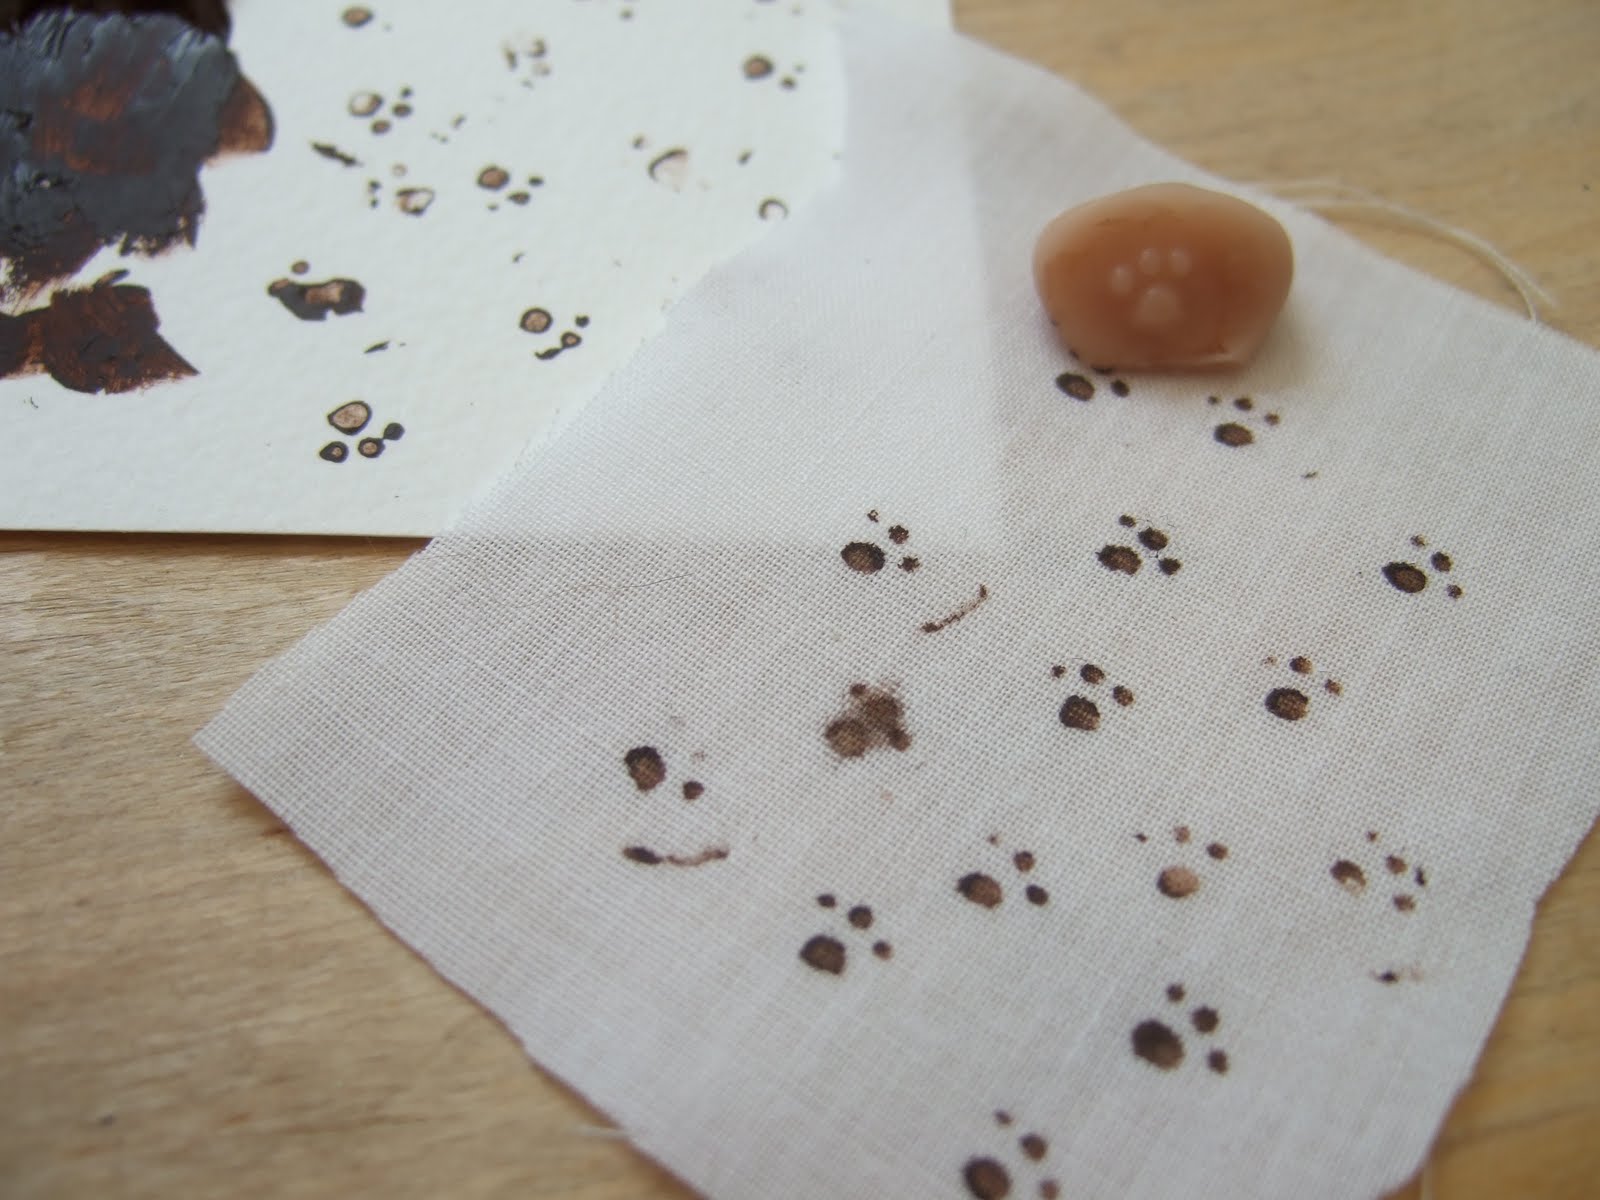 And here's the real culprit! Hopefully the full project will be done soon,and I'll be able to post more pictures of everything.
 This little fellow was a quick project the other night, made from bits of plastic and wood, four snaps, and a plastic bunny. I sprayed the whole thing gold (the only color I had on hand, truth be told), then used red/pink, green and blue acrylics to accent the toy. Finally, it all got a heavy antique brown wash and a thread pull . He's about 1 inch tall in all.
 This is going to be difficult to frame. It was sort of an impulsive painting, so I forgot to allow room around the edge for the frame to hide. There's plenty of room on the sides, and enough on the bottom edge, but I'm worried about the top. Please notice the warning along the left side. My mom jokes that "wet paint" is my signature.
 This doll and toy soldier in a box were fun! The doll was made according to instructions on Frances Armstrong's site. Both these projects found homes in micro scenes later on.
 These baskets are made of thread. They are slightly large for true 1/144th scale, but are quite effective in some settings where scale is not such an issue. As you can see, I got a bit carried away making these - I made about 30 in a few days at one point!
 This was just thrown together, using miniatures that needed a home. The chair is an N scale (1:160) brass piece. The music stand is also painted brass.
 On the chair is a 1/144th scale violin! It is made of styrene (plastic), paper, and various other materials. It took lots of experimenting to figure this one out! Though they cannot be seen in the pictures, there are even tiny black tuning pegs on the neck, as well as a black tail piece. The violin is about 1/8th of an inch long.
 The fuzzy African Violet was made by my mom from a kit. The muffins were a joint effort.
 To pass the time, I've been cutting scraps for more miniature scrap screens like this one. I'm thinking that I might make a scapbook or two as well. Unfortunately, I've run out of the unfinished screens that I used to use. Does anyone know a source for plain wooden (or even painted) screens?
  Empty, clean tic-tac containers are great for storing scrap, especially since I have a tendancy to knock containers over! Most scraps fit through the small top opening, but the entire white top can be removed if necessary. There are enough pieces here for one screen, with a quite a few left over.
 Top row: Lover's Vows, Alice in Wonderland, Heidi,The Monk, Lady Windermere's Fan, A Simple Story
 I didn't think to take photos of the process, but this is what I did with those shoes:
 It's just a quick re-cover, with fabrics and trims that I had on hand. I didn't cover the entire shoe, since the blue satin accents seemed like they would be too difficult to change. I worked around the blue details, and ended up gluing seven separate panels of the grey fabric. I used old remnants of grey linen, which appears quite blue in these pictures. The black trim is bunka, and all the other details are beaded and sequined elements cut from some netting a friend of the family gave me. It took me two evenings to cover the shoes, but I rushed a bit.
 Since making them, I've worn them out and about a few times. They seem to be holding up fairly well, though some of the beading I glued on the sides of the heel has been damaged.


.jpg)


.jpg)


.JPG)


+(2).jpg)


