

When I posted this doll last week, I promised a tutorial for the teddy bear. These cute little guys are really easy to make, and look great sitting in a toy box or on a bed. You don't need much experience with sculpting: the bear in the photo above was made on my second try!
You will need:polymer clay in tan
2 extra large black no-hole beads for eyes
light brown flocking
brown acrylic paint
fine-tipped paintbrush
glue
junky paintbrush for applying glue ( I used a foam brush)
liquid sculpy
toothpicks

Optional:
pink pastel chalk
silk ribbon


3. Attatch legs to the torso. A dot of liquid sculpy at the join helps the clay adhere.

4.After I attatched the legs, I decided I wanted my bear to be sitting instead, so I fussed around with his legs a bit. It would have been better to attatch his legs this way in the first place. I also gently bent the bottoms of the legs upwards to form feet.


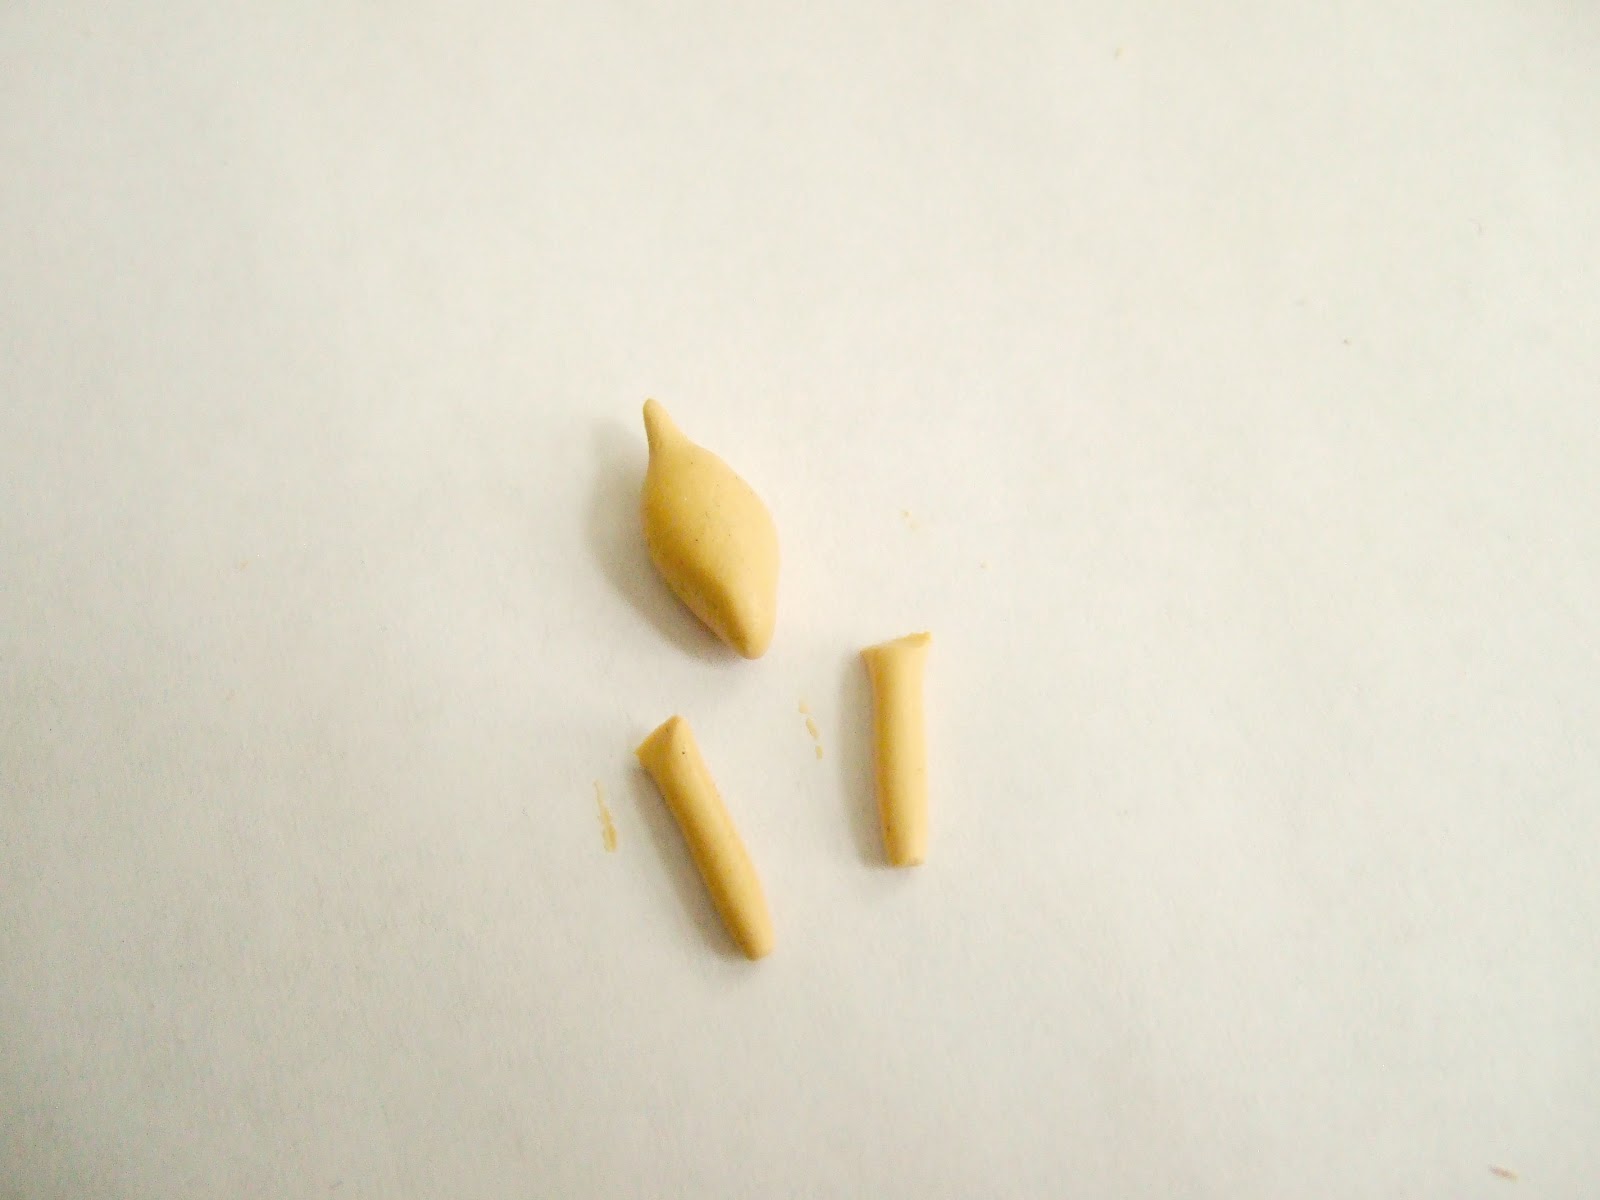
6. Cut arms from the thinner clay log. Use dots of liquid sculpy to join to the bear's body where the torso begins to narrow into the neck.
7. Bake your headless bear according to package instructions.

8. Roll a ball of clay to form head.

9. Use a little liquid sculpy to attatch the unbaked clay head to the hardened clay body.

10. Gently pinch a slight snout in the front of the head. From the side, your head should look rather like an egg.

11. Press the two black beads into the clay as eyes.

12. form two tiny balls for the ears.

13.Use the back of a paintbrush to cup ears.

13. Bake acording to package instructions.


15. Allow to dry. Try not to touch the wet flocking. When glue has dried, shake or blow on bear to remove excess flocking. The last two photos show the difference between the bear just out of the flocking, and then with the excess flocking removed.

16. Repeat glue and flocking on the upper half of the bear. Don't worry if the eyes are covered with flocking, that can easily be scraped off with your fingernail when dry. Allow to dry again.
17. Repeat flocking as many times as necessary to cover bald or thin patches. I had to flock my bear three or four times to get a nice dense fur look. You can see in the photo below that I missed a spot on the shoulder. There's flocking on that lighter patch, but it isn't as dense as the rest of the bear.

18.When all flocking is dry, and the eyes have been scraped clean of flocking, use your fine paint brush and acrylic paint to add a triangular nose and mouth on your bear.Be especially careful when painting the mouth! It is very easy to make the mouth too wide! If you do make a big mistake in painting, you can sometimes cover it up with a little flocking.
Finishing touches: I like to brush a little pink pastel dust inside the ears. You can also give your bear a bow made of silk ribbon , or a scarf made from a scrap of jersey.

You can see how slight changes will give each bear you make a unique character. While my bears have long, skinny bodies, the bear below has a round face and small, flat ears compared to the one above. You don't have to stop at just bears! With different coloring, slightly larger ears, and a wire tail, the bear above could have easily become a mouse instead.


.JPG)
.jpg)


.jpg)


.JPG)


+(2).jpg)


Oh so sweet.
ReplyDeleteThanks for your tutorial
But I wonder what kind of flock you have used. Where can I buy it?
I live in Sweden.
Britt
e-mail: britt@fingerborgen.se
Il est charmant ce petit ours!! merci pour le tuto.
ReplyDeleteisabelle
Thats really neat!Thank you!
ReplyDeleteThats really neat!Thank you!
ReplyDeleteMuchas gracias, es precioso.
ReplyDeleteThank you for this wonderful tutorial, Eliza! Now I have to see where I can buy this "flock", it isn't that easy here.
ReplyDeleteHugs, Ilona
Thank you so much, Eliza. He is adorable. It seems so simple to do judging from your tutorial. This is something I definitely will try. I will go to the dollar store or Michaels to get the flocking.
ReplyDeleteLove your bears! They look just like a life size antique bear in my collection.
ReplyDeleteThank you so much for sharing!!
ReplyDeleteHad niet verwacht dat je deze beer van klei had gemaakt. Mooi om te zien hoe de beer is ontstaan.
ReplyDeleteGroeten Xandra
Hello Eliza,
ReplyDeleteThank you so much for the great tutorial. I cannot wait to try this one.
Big hug,
Giac
The little bear is adorable...I can't wait to try out your techniques! Thank you for your generosity in sharing...I love your blog!
ReplyDeleteYour bear is adorable. Thanks for the tutorial.
ReplyDeleteGreetings, Faby
El oso te ha quedado precioso!!! Muchas gracias por compartir tu técnica.
ReplyDeleteBesos.
What a lovely teddybear!
ReplyDeleteTanks for the DIY, I shall try to make it.
A beautiful little teddy bear. Thank you for this great tutorial very much appreciated.
ReplyDeleteHugs, Drora
This comment has been removed by a blog administrator.
ReplyDeleteThis is such a great,easy tutorial-can't wait to try it. Thanx for sharing your techniques!
ReplyDeleteWhile you are staying in you Orlando Florida private vacation villas or Disney World rental home and feel the need to get away to a fabulous beach area, then Daytona Beach is just the place for you. At Daytona Beach, you will enter a laid back world where you can don blue jeans, wear flip-flops and eat at the fanciest restaurant in town without a jacket. most famous teddy bears
ReplyDelete